Introduction
After finishing my book about Getting GitOps, which you can download for free from Red Hat Developers web site, I thought it’s time to have a better and more realistic use case than just a simple and boring PersonService which does nothing, except reading and writing data to a database.
Boring.
Also, if you have a look at Quarkus today, you’ll immediately realize that working with this framework is both: awesome and complex.
So why not doing both now? Creating a more realistic example for the content written in the book and explaining more about the in my humble opinion, as someone who has used Java since 1998, greatest Java framework & Java runtime available nowadays?
So I was thinking hard what to do now.
Then I played a bit with JavaScript and the HTML 5 Canvas API and I thought: Wow! The last time I was coding something which ended up in being used for a commercial game is already 25 years ago. I still was a student and I still had my good old Amiga 1200, which I have used to create a game engine. And I still remember how hard it was to bring animated graphics on the screen.
And now it’s possible with a scripting language on a Browser? — Let’s try it out!
So I started writing a game in JavaScript, which uses a backend system written in Java with Quarkus. All the GitOps concepts as discussed in my book should be reused for this project.
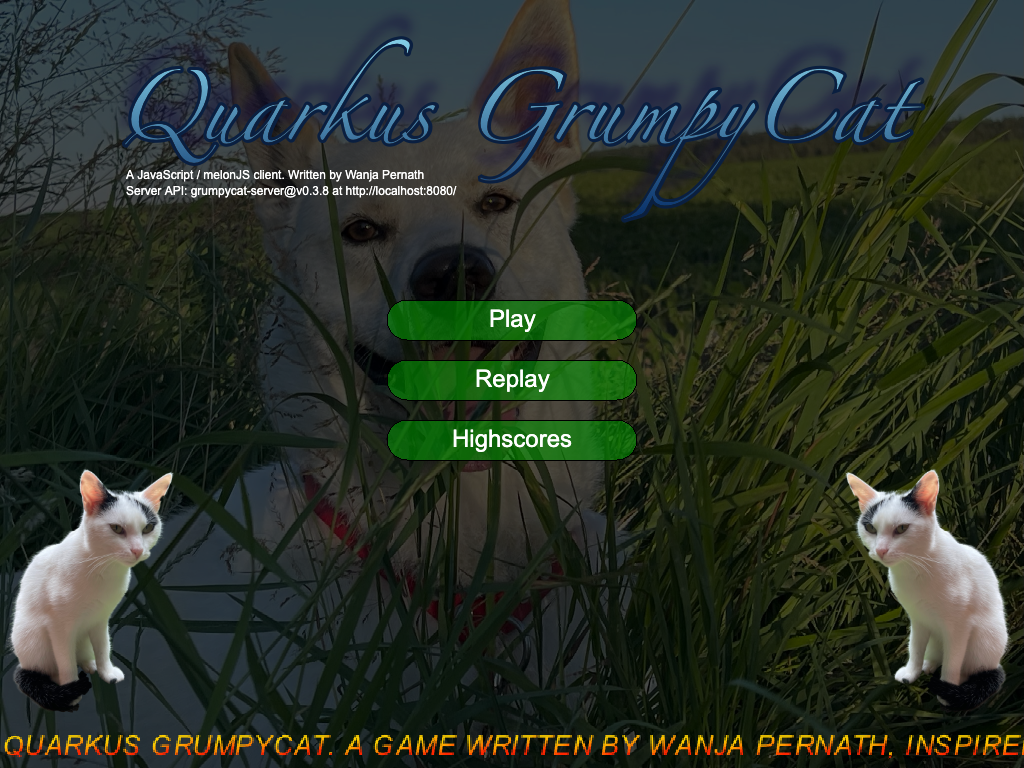
So this is the story about creating the game, using Quarkus in a more complex scenario than a simple HelloWorld example and about developing in a modern environment, where people are using different tools and programming languages but will deploy everything on a Kubernetes distribution. And here is the complete source code. And here you’re able to play the game as it is right now.
The general directory structure of the sources
Once you’ve forked and cloned the repository from GitHub, you can see the following folders:
/docsJust a bunch of images for the documentation/gitopsEverything you need to setup a dev pipeline in Kubernetes / OpenShift (ArgoCD apps, Tekton pipelines etc.)/kubernetes-configA set ofkustomizedfiles to quickly install the complete application in a Kubernetes namespace calledgrumpycat/melonjs-clientThe JavaScript client source code/quarkus-serverThe sources of the Quarkus based server/tiledAll sources in Tiled MapEditor format to change levels or create your own onesdocker-compose.yamlA docker-compose script to start everything locally in a Docker or Podman environmentpom.xmlThe grumpy cat application is a multi module maven project. This is the main POM.
The general high-level architecture of the game
The whole game right now has four components (as seen in figure #1):
cat-clientThe JavaScript client running entirely on a browsercat-serverThe grumpy cat server instancegrumpy-kafkaThe Apache Kafka messaging instancecat-dbA PostgreSQL server instance used to store scores, player actions, games and multiplayer sessions

Typically, the user is just interacting with the game via the client, which runs entirely on the browser (Chrome 100+, Firefox, Safari). All the processing and calculation of enemy movement is done in JavaScript. However, once the next position was calculated, it will be send to the server to either be stored in the database (single player) or being sent to other players of a multiplayer session).
The server has a rich REST API, which is being used to do several important things during the game loop:
- Downloading a map with tile set informations
- Creating a single player game
- Creating and managing a multiplayer game
- etc.
The Quarkus server
Introduction
At the beginning the Quarkus based server was just a bunch of REST services to be used to
- Download a map
- Download a tileset
- Managing highscores
- Generating fake names for the players using a library called data faker.
After a while, I wanted to store player and enemy movements to have some kind of a game replay feature in single player mode. So I started playing with WebSockets and an Apacha Kafka based messaging system.
The reason for choosing Kafka is quite easy. Even if the client just sends each keystroke to the server, it could end up in getting 60 keystroke events per second, as the client runs with 60FPS. And then there are still enemy movements which need to be send to the server and stored in a database as well. The more enemies there are in a map, the more data needs to be send to the server. So there must be some kind of messaging system to have a buffer between client sending mass data and the server processing those streams and storing the data into a database.
Fortunately, Quarkus makes it very easy to use Kafka.
After I have implemented the „Replay“ feature, I wanted to have special maps where up to 4 players are able to play against each other. So there was the requirement of a multi player handling feature to be implemented as well. I played with just another REST service, but ended up in horrible stability issues, so I needed to use a different feature: A web socket.
Using a web socket makes it easy to send and consume messages to and from the client. Again, thanks to Quarkus, it’s an easy thing to implement a Web Socket.
Finally, I wanted to have some nice reports to see who has played in which game and who is the winner of a multi player match. This feature was implemented using Quarkus Qute, an easy to use templating engine.
The initial setup
As discussed in chapter one of my book or in a different blog post here, setting up a Quarkus project with everything we need, is quite easy. Thanks to Quarkus with its great extension mechanism, we just add what we need when we need it. So we’re now focusing on the basics:
- A REST endpoint server
- An accessible database with Hibernate ORM
- Possibility to create a container image which should be stored in an external registry like quay.io
- Basic Kubernetes manifest generation
This means, we need to setup a new Quarkus project with the following extensions:
quarkus-resteasy-reactiveThe default REST environment of Quarkus since 2.10ishquarkus-resteasy-reactive-jacksonAs we are in a mixed environment, we need to be able to read and write JSONquarkus-container-image-jibBuilding container images with JIBquarkus-kubernetesBeing able to generate Kubernetes manifest filesquarkus-hibernate-orm-panacheThe simplified Hibernate ORM stackquarkus-jdbc-postgresqlThe JDBC driver to use a PostgreSQL database
The following command will create such a project for us:
$ quarkus create app org.wanja.grumpycat:cat-server:0.0.1 \
	-x resteasy-reactive-jackson,\
		container-image-jib,\
		kubernetes,\
		hibernate-orm-panache,\
		jdbc-postgresql

Looking for the newly published extensions in registry.quarkus.io
-----------
selected extensions:
- io.quarkus:quarkus-hibernate-orm-panache
- io.quarkus:quarkus-kubernetes
- io.quarkus:quarkus-container-image-jib
- io.quarkus:quarkus-jdbc-postgresql
- io.quarkus:quarkus-resteasy-reactive-jackson


applying codestarts...
????  java
????  maven
????  quarkus
????  config-properties
????  dockerfiles
????  maven-wrapper
????  resteasy-reactive-codestart

-----------
[SUCCESS] ✅  quarkus project has been successfully generated in:
--> /Users/wanja/Devel/grumpy/cat-server
-----------
Navigate into this directory and get started: quarkus dev
Code language: JavaScript (javascript)
Before we are now going to edit a source file, we need to configure the extensions, so that we are able to easily build and deploy our app later on.
a) Generating a container image
By just adding the extension, we are able to build and push an image to an external registry during the build process. In order to let Quarkus know where we want to push our image to, we need to provide some properties.
#
# container image properties
#
quarkus.container-image.image=quay.io/wpernath/cat-server:v${quarkus.application.version}
quarkus.container-image.builder=jib
quarkus.container-image.build=false
quarkus.container-image.push=false
quarkus.native.container-build=true

Code language: PHP (php)
This tells Quarkus to push the generated image to quay.io/wpernath/cat-server and to use container build if we want to go native.
We are now able to build our project by executing the following command:
$ mvn clean package -Dquarkus.container-image.push=true
Code language: JavaScript (javascript)
This will create the container image and will push it to the external registry. By using ${quarkus.application.version} we are going to get a tagged image. The version will be read from the pom.xml file.
b) Creating Kubernetes manifest files
Again, we are just adding the extension and Quarkus will generate the standard Kubernetes manifest files, like Deployment and Service. If we need other files, like a Route, we can provide it in a file called src/main/kubernetes/kubernetes.yml. If we need more control about the generation process, we can provide some properties.

For example, if we need to read data from a ConfigMap or a secret and project their values as properties or environment variables, we simply provide a quarkus.kubernetes.env.secrets=<secret-name> property.
#
# Kubernetes
#
quarkus.kubernetes.part-of=grumpycat
quarkus.kubernetes.name=cat-server
quarkus.kubernetes.version=v${quarkus.application.version}
quarkus.kubernetes.env.secrets=cat-pguser-cat

# Resource management
quarkus.kubernetes.resources.requests.memory=128Mi
quarkus.kubernetes.resources.requests.cpu=250m
quarkus.kubernetes.resources.limits.memory=512Mi
quarkus.kubernetes.resources.limits.cpu=1000m
Code language: PHP (php)
If we are now building our cat-server application, we are also getting a target/kubernetes/kubernetes.yml file, which we can use to deploy our server to Kubernetes and OpenShift.

And if we’d add two more extensions to our pom.xml, we will also automatically get metrics and health checks for all of our external dependencies. Those extensions are:
quarkus-smallrye-healthfor health checks andquarkus-micrometer-registry-prometheusfor metrics
$ quarkus ext add smallrye-health micrometer-registry-prometheus
????  Extension io.quarkus:quarkus-smallrye-health was already installed
????  Extension io.quarkus:quarkus-micrometer-registry-prometheus was already installed

$ mvn clean package
$ cat target/kubernetes/kubernetes.yml
...
  spec:
      containers:
        - env:
            - name: KUBERNETES_NAMESPACE
              valueFrom:
                fieldRef:
                  fieldPath: metadata.namespace
          envFrom:
            - secretRef:
                name: cat-pguser-cat
          image: quay.io/wpernath/cat-server:v0.0.1
          imagePullPolicy: Always
          livenessProbe:
            failureThreshold: 3
            httpGet:
              path: /q/health/live
              port: 8080
              scheme: HTTP
            initialDelaySeconds: 0
            periodSeconds: 30
            successThreshold: 1
            timeoutSeconds: 10
          name: cat-server
          readinessProbe:
            failureThreshold: 3
            httpGet:
              path: /q/health/ready
              port: 8080
              scheme: HTTP
            initialDelaySeconds: 0
            periodSeconds: 30
            successThreshold: 1
            timeoutSeconds: 10
...
Code language: JavaScript (javascript)
c) Adding and using a database
By simply adding the JDBC driver as a Quarkus extension and Hibernate as ORM mapper, we already have everything we need to start developing and using the database. As the whole process was already explained deeply in the book and here, I do not explain it again in this blog post.
The most important part for now is that we have to define some properties to make sure, we are able to use it later on Kubernetes as well. Those properties are:
#
# Datasource options
#
quarkus.datasource.db-kind=postgresql
quarkus.hibernate-orm.log.sql=false
quarkus.hibernate-orm.log.format-sql=true

# the following props only for production
%prod.quarkus.hibernate-orm.database.generation=update
%prod.quarkus.datasource.username=${user:cat}
%prod.quarkus.datasource.password=${password:grumpy}
%prod.quarkus.datasource.jdbc.url=jdbc:postgresql://${host:catserver}/${dbname:catdb}

Code language: PHP (php)
They tell Quarkus to use PostgreSQL as datasource and as soon as we are not running in Quarkus’ Dev mode, the database should be reached via the mentioned URL. The variables user, passworld, host and dbname will be replaced by the content of the secret cat-pguser-cat, which we have defined in the last step. Now it’s time to see how we are deploying the database in Kubernetes / OpenShift.
For this we are going to use a Kubernetes Operator called CrunchyData PostgreSQL Operator, which needs to be installed in the Kubernetes Cluster. Then we are able to create and deploy a YAML file, which describes our database:
apiVersion: postgres-operator.crunchydata.com/v1beta1
kind: PostgresCluster
metadata:
  name: cat
spec:
  postgresVersion: 13
  instances:
    - name: instance1
      dataVolumeClaimSpec:
        accessModes:
        - "ReadWriteOnce"
        resources:
          requests:
            storage: 1Gi
  backups:
    pgbackrest:
      repos:
      - name: repo1
        volume:
          volumeClaimSpec:
            accessModes:
            - "ReadWriteOnce"
            resources:
              requests:
                storage: 1Gi
Code language: JavaScript (javascript)
If we are now adding this file to src/main/kubernetes/kubernetes.yml, we have everything we need to deploy our application including a database in Kubernetes. The steps are:
$ mvn clean package -Dquarkus.container-image.push=true
[...]
$ oc login <log into openshift or kubernetes>
$ oc apply -f target/kubernetes/kubernetes.yml
Code language: HTML, XML (xml)
This is, BTW, exactly the same for all external dependencies we might have over the development of our application. In development mode, we use a proper Quarkus extension. We configure that extension and use the %prod profile in application.properties to make sure we do not overwrite our Quarkus Dev Service instance. Then we are going to find a proper way to install that dependency in Kubernetes, either by looking for an Operator or by finding a nice Helm Chart. Then we create a custom resource YAML file and add that to our src/main/kubernetes/kubernetes.yml. And if the Operator for the dependency requires us to read a secret, we add that secret to quarkus.kubernetes.env.secrets property.
This is one of the reasons, I like Quarkus so much. It makes boring tasks so easy.
The JavaScript client
Introduction
Learning a complete new language is not always the easiest thing you could do. And learning JavaScript (a typeless language) is one of the hardest things you can do, if you’re coming from a language like Java, which has strong types. But I have to say, the last time I was using JavaScript is already quite some time ago. I have used JavaScript for some AJAX features in 2006ish. So perhaps I am not in a position to judge the language.
After I have played with HTML5/Canvas API directly, I decided to use a nice and fast game framework based on JavaScript ES6, which brings quite some nice features like layered rendering, resource loading etc. The framework is called MelonJS. There is an easy to use boilerplate repository on GitHub, which you can use in order to setup your first project with MelonJS.
Although the client runs entirely on the browser, we still need some kind of a server which lets the user download the HTML pages and JavaScript stuff of the game. I have played a lot with node and nginx as server, but that would mean I have to manually create a container image out of everything. Also, there might be a time later, where I’d need some server side Java, so I decided to use Quarkus as framework as well, although I am not using a lot of features, I am able to generate container images out of the box. And I am able to use some Java features If required.
The initial setup
First of all, let’s create the initial Quarkus project, by executing the following command, as already explained above:
$ quarkus create app org.wanja.grumpycat:cat-client:0.0.1 \
	--no-code \
	-x resteasy-reactive-jackson,\
		container-image-jib,\
		kubernetes

Looking for the newly published extensions in registry.quarkus.io
-----------
selected extensions:
- io.quarkus:quarkus-kubernetes
- io.quarkus:quarkus-container-image-jib
- io.quarkus:quarkus-resteasy-reactive-jackson

applying codestarts...
????  java
????  maven
????  quarkus
????  config-properties
????  dockerfiles
????  maven-wrapper

-----------
[SUCCESS] ✅  quarkus project has been successfully generated in:
--> /Users/wanja/Devel/grumpy/cat-client
-----------
Navigate into this directory and get started: quarkus dev
Code language: JavaScript (javascript)
As the main reason to use Quarkus here is to be able to reuse the ability to quickly generate Kubernetes manifests and a container image, we simply add the corresponding extensions and configurations to our project as we’ve done it right before with the cat-server.
Then we need to setup the JavaScript development environment by copying all the code of the melonJS boilerplate repository to corresponding folders of the Quarkus project setup.
As we are using JavaScript and the target is a browser client, we have to make sure that all our classes we’re going to create for the client will be bundled in one large JavaScript module. WebPack is the default solution for the boilerplate collection.
Once we’re done, we need to find a way to build our Quarkus project including the JavaScript stuff without loosing the ability to quickly develop with JavaScript. So I don’t want to loose the ability to run my development environment with a simple
$ npm install
$ npm run dev
But I surely want to use maven for automating the complete build. So a
$ mvn clean package -Dquarkus.container-image.push=true
Code language: JavaScript (javascript)
Should build everything and should create a working container image for my client application.
For this we are going to use the frontend maven plugin, which needs to be configured in the pom.xml of the client.
a) Configure image generation and Kubernetes manifest creation
As you’ve already seen in the chapter above, you should configure both extensions we are going to use in the client code: Kubernetes and Container-Image. Just open the application.properties file and copy the following text into it:
#
# container image properties
#
quarkus.container-image.image=quay.io/wpernath/cat-client:v${quarkus.application.version}
quarkus.container-image.builder=jib
quarkus.container-image.build=false
quarkus.container-image.push=false
quarkus.native.container-build=true


#
# Kubernetes
#
quarkus.kubernetes.part-of=grumpycat
quarkus.kubernetes.name=cat-client
quarkus.kubernetes.version=v${quarkus.application.version}

# Resource management
quarkus.kubernetes.resources.requests.memory=128Mi
quarkus.kubernetes.resources.requests.cpu=250m
quarkus.kubernetes.resources.limits.memory=512Mi
quarkus.kubernetes.resources.limits.cpu=1000m

Code language: PHP (php)
And if you’d add the following property to your application.properties, you’d be able to start both projects (client and server) parallel:
# make sure, quarkus runs on 8081
%dev.quarkus.http.port=8081
Code language: PHP (php)
This lets the quarkus HTTP server run on a different port than the default 8080.
b) Mavenize the JavaScript boilerplate setup
There is not too much to do. Just put the following files into the root directory of your newly created maven project:
babel.config.jsonpackage.jsonwebpack.config.js
And then copy the content of the /src folder into a newly created folder under /src/main/client of the maven project.
c) Configuring frontend-maven-plugin
As described in the readme of the plugin, configuring it is quite easy. Just put the following as a plugin section in the pom.xml file of the client and we do have what we need.
      <plugin>
        <groupId>com.github.eirslett</groupId>
        <artifactId>frontend-maven-plugin</artifactId>
        <version>1.12.1</version>

        <configuration>
          <installDirectory>target</installDirectory>
        </configuration>

        <executions>
          <execution>
            <id>install node and npm</id>
            <goals>
              <goal>install-node-and-npm</goal>
            </goals>
            <configuration>
              <nodeVersion>v16.18.0</nodeVersion>
            </configuration>
          </execution>

          <execution>
            <id>npm install</id>
            <goals>
              <goal>npm</goal>
            </goals>
            <phase>generate-resources</phase>
            <configuration>
              <arguments>install --unsafe-perm</arguments>
            </configuration>
          </execution>

          <execution>
            <id>npm run build</id>
            <goals>
              <goal>npm</goal>
            </goals>
            <phase>compile</phase>
            <configuration>
              <arguments>run build</arguments>
            </configuration>
          </execution>
        </executions>
      </plugin>
Code language: HTML, XML (xml)
Now whenever we rebuild our client application, we are getting a fresh container image with the front-end code compiled and included as well. But there is still one thing left to do
d) Configuring WebPack to build into maven target
For this we have to open the file webpack.config.js and need to make sure that the output of the module.exports section points to the corresponding target folder of our maven build.
[...]
module.exports = {
	entry: ["./src/main/client/index.js"],
	target: "web",
	output: {
		path: __dirname + "/target/classes/META-INF/resources/generated/",
		filename: "grumpycat.bundle.js",
	},

[...]
Code language: JavaScript (javascript)
Now you should be able to develop as a frontend developer by executing
$ npm install
$ npm run dev
And once you’re finished editing JavaScript in /src/main/client/ you should be able to execute
$ mvn clean package -Dquarkus.container-image.push=true
Code language: JavaScript (javascript)
To generate a container image and all required Kubernetes files. Then you’re able to quickly install that image on OpenShift / Kubernetes, by executing
$ oc apply -f target/kubernetes/kubernetes.yml
A Quarkus multi module project
Now we have two Quarkus projects ready to be developed on. But of course it would be great, if we could have a multi module maven project. So let’s create one now.
First of all, we have to setup a main pom.xml where we are going to put all Quarkus extensions, which we are going to use in both projects. These are the Kubernetes extension and the container-image extension.
Then we have to make sure, both projects are referring to this main POM. And finally, we are going to remove those extensions, we have defined in the main POM.
Setting up the main POM
Simply create a new file called pom.xml and place it in the folder where cat-client and cat-server modules are located. Open it in your preferred editor and copy the following content in:
<?xml version="1.0"?>
<project xsi:schemaLocation="http://maven.apache.org/POM/4.0.0 https://maven.apache.org/xsd/maven-4.0.0.xsd" xmlns="http://maven.apache.org/POM/4.0.0"
    xmlns:xsi="http://www.w3.org/2001/XMLSchema-instance">
  <modelVersion>4.0.0</modelVersion>
  <groupId>org.wanja.grumpycat</groupId>
  <artifactId>grumpycat</artifactId>
  <version>0.0.1</version>
  <packaging>pom</packaging>
  <modules>
    <module>cat-server</module>
    <module>cat-client</module>
  </modules>
</project>
Code language: HTML, XML (xml)
Now we are going to add all common Quarkus dependencies in here:
    <properties>
        <compiler-plugin.version>3.8.1</compiler-plugin.version>
        <failsafe.useModulePath>false</failsafe.useModulePath>
        <maven.compiler.release>11</maven.compiler.release>
        <project.build.sourceEncoding>UTF-8</project.build.sourceEncoding>
        <project.reporting.outputEncoding>UTF-8</project.reporting.outputEncoding>
        <quarkus.platform.artifact-id>quarkus-bom</quarkus.platform.artifact-id>
        <quarkus.platform.group-id>io.quarkus.platform</quarkus.platform.group-id>
        <quarkus.platform.version>2.13.3.Final</quarkus.platform.version>
        <surefire-plugin.version>3.0.0-M5</surefire-plugin.version>
    </properties>

    <dependencyManagement>
        <dependencies>
            <dependency>
                <groupId>${quarkus.platform.group-id}</groupId>
                <artifactId>${quarkus.platform.artifact-id}</artifactId>
                <version>${quarkus.platform.version}</version>
                <type>pom</type>
                <scope>import</scope>
            </dependency>
        </dependencies>
    </dependencyManagement>

    <dependencies>
        <dependency>
            <groupId>io.quarkus</groupId>
            <artifactId>quarkus-resteasy-reactive</artifactId>
        </dependency>
		[...]
	</dependencies>
Code language: HTML, XML (xml)
And finally we’re going to open the POMs of the dependent modules and are going to remove those dependencies which we have added to the umbrella POM and adding a parent section to their XML.
Changing the module POMs
The cat-server and cat-client POMs need to be fixed now. So open them and add the following section to it:
<artifactId>cat-client</artifactId>

<parent>
  <groupId>org.wanja.grumpycat</groupId>
  <artifactId>grumpycat</artifactId>
  <version>0.0.1</version>
  <relativePath>../</relativePath>
</parent>
Code language: HTML, XML (xml)
And then we can safely delete the properties section in the modules and remove those dependencies, we have added to the umbrella module. The result is a clean and easier to maintain dependency section of all client modules.
Now we are able to easily execute Maven in the location of the umbrella POM and will get what we need by just executing one command.
$ mvn clean package -Dquarkus.container-image.push=true
Code language: JavaScript (javascript)
Conclusion
In article you’ve learned how easy it is to setup a new Quarkus project which should also generate Kubernetes manifest files and should produce a container image.
We now have everything we need to start developing our game, which we are going to discuss in the next chapters of this article series.
Next time we are developing the basic client to download a map file (and display its contents to the screen with MelonJS techniques) and we are going to implement a Highscore REST API to store the scores.
We are also going to use Kafka to pickup player movements and store them in a database.
Then we are going to setup multi player management for our game.
I hope, you enjoyed reading this article.
3 replies on “Using Quarkus to develop a multiplayer game – Chapter #1 – Initial setup”
[…] chapter two of the article series on how to develop a multiplayer game with Quarkus and JavaScript. While chapter one was focussing on the initial setup of the two projects including manifest files for Kubernetes, this chapter is […]
[…] Using Quarkus to develop a multiplayer game – Chapter #1 – Initial setup Using Quarkus to develop a multiplayer game – Chapter #2 – The server feeds the client […]
[…] and going through it. If you want to understand how it was developed, please have a look at the other posts here on this […]