The NVIDIA GPU Operator is used to manage GPU nodes in OpenShift and make these GPUs consumable for application workloads in an OpenShift cluster. There are several use cases which fit e.g, AI/ML workloads, data analysis, 3D processing. All of these can be done within an OpenShift cluster with GPU power enabled.
So, today I would like to show you how to install the NVIDIA GPU Operator in a nutshell, so you can start using this new power in your cluster. Lets go!
Note: Cluster administrator privileges are necessary for all steps
1. Create a project
oc new-project gpu-operator-resourcesCode language: JavaScript (javascript)2. Install the Operator
Go to your OpenShift WebConsole and navigate to your fresh project “gpu-operator-resources”.

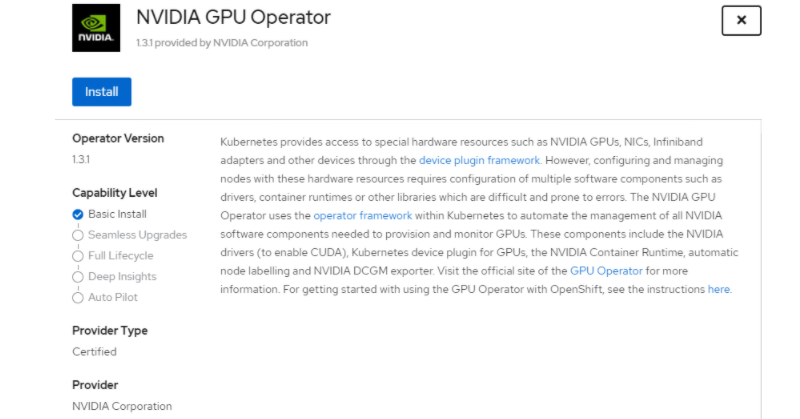
Next step is to navigate to Operators > OperatorHub, then search for the NVIDIA GPU Operator.

In the dialog click Install.
Repeat these steps for Node Feature Discovery Operator.

3. Identifying GPU nodes
Now it is time to identify nodes with GPU power in your cluster. You should see two Operators in your Installed Operators as shown on the example underneath.
To identify GPU nodes click Node Feature Discovery

Go to Node Feature Discovery tab and click
Create NodeFeatureDiscovery

Now create this object by clicking Create.

Your Pod overview should look like shown in the next screenshot now.

Or if you are using the OC-Client it should look like this:
oc get pods
NAME               READY   STATUS    RESTARTS   AGE
nfd-master-2hrmh   1/1     Running   0          12s
nfd-master-gscpr   1/1     Running   0          12s
nfd-master-rfkdx   1/1     Running   0          12s
nfd-worker-2xjwg   1/1     Running   0          12s
nfd-worker-9b8pq   1/1     Running   1          12s
nfd-worker-bcm24   1/1     Running   1          12s
nfd-worker-cw86h   1/1     Running   1          12s
nfd-worker-q6lhn   1/1     Running   0          12s
nfd-worker-zf26h   1/1     Running   0          12s
Code language: JavaScript (javascript)
After a short while the NFD Operator will label nodes in the cluster with GPU power.
4. Create a cluster-wide entitlement
At this point you will need a cluster-wide entitlement. This is required to download packages used to build the driver container. I assume you downloaded an entitlement encoded in base64 from access.redhat.com or extracted it from an existing node.
You can use this template, replace BASE_64_ENCODED_PEM_FILE with sed and create the MachineConfigs.
apiVersion: machineconfiguration.openshift.io/v1
kind: MachineConfig
metadata:
  labels:
    machineconfiguration.openshift.io/role: worker
  name: 50-rhsm-conf
spec:
  config:
    ignition:
      version: 2.2.0
    storage:
      files:
      - contents:
          source: data:text/plain;charset=utf-8;base64,IyBSZWQgSGF0IFN1YnNjcmlwdGlvbiBNYW5hZ2VyIENvbmZpZ3VyYXRpb24gRmlsZToKCiMgVW5pZmllZCBFbnRpdGxlbWVudCBQbGF0Zm9ybSBDb25maWd1cmF0aW9uCltzZXJ2ZXJdCiMgU2VydmVyIGhvc3RuYW1lOgpob3N0bmFtZSA9IHN1YnNjcmlwdGlvbi5yaHNtLnJlZGhhdC5jb20KCiMgU2VydmVyIHByZWZpeDoKcHJlZml4ID0gL3N1YnNjcmlwdGlvbgoKIyBTZXJ2ZXIgcG9ydDoKcG9ydCA9IDQ0MwoKIyBTZXQgdG8gMSB0byBkaXNhYmxlIGNlcnRpZmljYXRlIHZhbGlkYXRpb246Cmluc2VjdXJlID0gMAoKIyBTZXQgdGhlIGRlcHRoIG9mIGNlcnRzIHdoaWNoIHNob3VsZCBiZSBjaGVja2VkCiMgd2hlbiB2YWxpZGF0aW5nIGEgY2VydGlmaWNhdGUKc3NsX3ZlcmlmeV9kZXB0aCA9IDMKCiMgYW4gaHR0cCBwcm94eSBzZXJ2ZXIgdG8gdXNlCnByb3h5X2hvc3RuYW1lID0KCiMgVGhlIHNjaGVtZSB0byB1c2UgZm9yIHRoZSBwcm94eSB3aGVuIHVwZGF0aW5nIHJlcG8gZGVmaW5pdGlvbnMsIGlmIG5lZWRlZAojIGUuZy4gaHR0cCBvciBodHRwcwpwcm94eV9zY2hlbWUgPSBodHRwCgojIHBvcnQgZm9yIGh0dHAgcHJveHkgc2VydmVyCnByb3h5X3BvcnQgPQoKIyB1c2VyIG5hbWUgZm9yIGF1dGhlbnRpY2F0aW5nIHRvIGFuIGh0dHAgcHJveHksIGlmIG5lZWRlZApwcm94eV91c2VyID0KCiMgcGFzc3dvcmQgZm9yIGJhc2ljIGh0dHAgcHJveHkgYXV0aCwgaWYgbmVlZGVkCnByb3h5X3Bhc3N3b3JkID0KCiMgaG9zdC9kb21haW4gc3VmZml4IGJsYWNrbGlzdCBmb3IgcHJveHksIGlmIG5lZWRlZApub19wcm94eSA9CgpbcmhzbV0KIyBDb250ZW50IGJhc2UgVVJMOgpiYXNldXJsID0gaHR0cHM6Ly9jZG4ucmVkaGF0LmNvbQoKIyBSZXBvc2l0b3J5IG1ldGFkYXRhIEdQRyBrZXkgVVJMOgpyZXBvbWRfZ3BnX3VybCA9CgojIFNlcnZlciBDQSBjZXJ0aWZpY2F0ZSBsb2NhdGlvbjoKY2FfY2VydF9kaXIgPSAvZXRjL3Joc20vY2EvCgojIERlZmF1bHQgQ0EgY2VydCB0byB1c2Ugd2hlbiBnZW5lcmF0aW5nIHl1bSByZXBvIGNvbmZpZ3M6CnJlcG9fY2FfY2VydCA9ICUoY2FfY2VydF9kaXIpc3JlZGhhdC11ZXAucGVtCgojIFdoZXJlIHRoZSBjZXJ0aWZpY2F0ZXMgc2hvdWxkIGJlIHN0b3JlZApwcm9kdWN0Q2VydERpciA9IC9ldGMvcGtpL3Byb2R1Y3QKZW50aXRsZW1lbnRDZXJ0RGlyID0gL2V0Yy9wa2kvZW50aXRsZW1lbnQKY29uc3VtZXJDZXJ0RGlyID0gL2V0Yy9wa2kvY29uc3VtZXIKCiMgTWFuYWdlIGdlbmVyYXRpb24gb2YgeXVtIHJlcG9zaXRvcmllcyBmb3Igc3Vic2NyaWJlZCBjb250ZW50OgptYW5hZ2VfcmVwb3MgPSAxCgojIFJlZnJlc2ggcmVwbyBmaWxlcyB3aXRoIHNlcnZlciBvdmVycmlkZXMgb24gZXZlcnkgeXVtIGNvbW1hbmQKZnVsbF9yZWZyZXNoX29uX3l1bSA9IDAKCiMgSWYgc2V0IHRvIHplcm8sIHRoZSBjbGllbnQgd2lsbCBub3QgcmVwb3J0IHRoZSBwYWNrYWdlIHByb2ZpbGUgdG8KIyB0aGUgc3Vic2NyaXB0aW9uIG1hbmFnZW1lbnQgc2VydmljZS4KcmVwb3J0X3BhY2thZ2VfcHJvZmlsZSA9IDEKCiMgVGhlIGRpcmVjdG9yeSB0byBzZWFyY2ggZm9yIHN1YnNjcmlwdGlvbiBtYW5hZ2VyIHBsdWdpbnMKcGx1Z2luRGlyID0gL3Vzci9zaGFyZS9yaHNtLXBsdWdpbnMKCiMgVGhlIGRpcmVjdG9yeSB0byBzZWFyY2ggZm9yIHBsdWdpbiBjb25maWd1cmF0aW9uIGZpbGVzCnBsdWdpbkNvbmZEaXIgPSAvZXRjL3Joc20vcGx1Z2luY29uZi5kCgojIE1hbmFnZSBhdXRvbWF0aWMgZW5hYmxpbmcgb2YgeXVtL2RuZiBwbHVnaW5zIChwcm9kdWN0LWlkLCBzdWJzY3JpcHRpb24tbWFuYWdlcikKYXV0b19lbmFibGVfeXVtX3BsdWdpbnMgPSAxCgojIFJ1biB0aGUgcGFja2FnZSBwcm9maWxlIG9uIGVhY2ggeXVtL2RuZiB0cmFuc2FjdGlvbgpwYWNrYWdlX3Byb2ZpbGVfb25fdHJhbnMgPSAwCgojIElub3RpZnkgaXMgdXNlZCBmb3IgbW9uaXRvcmluZyBjaGFuZ2VzIGluIGRpcmVjdG9yaWVzIHdpdGggY2VydGlmaWNhdGVzLgojIEN1cnJlbnRseSBvbmx5IHRoZSAvZXRjL3BraS9jb25zdW1lciBkaXJlY3RvcnkgaXMgbW9uaXRvcmVkIGJ5IHRoZQojIHJoc20uc2VydmljZS4gV2hlbiB0aGlzIGRpcmVjdG9yeSBpcyBtb3VudGVkIHVzaW5nIGEgbmV0d29yayBmaWxlIHN5c3RlbQojIHdpdGhvdXQgaW5vdGlmeSBub3RpZmljYXRpb24gc3VwcG9ydCAoZS5nLiBORlMpLCB0aGVuIGRpc2FibGluZyBpbm90aWZ5CiMgaXMgc3Ryb25nbHkgcmVjb21tZW5kZWQuIFdoZW4gaW5vdGlmeSBpcyBkaXNhYmxlZCwgcGVyaW9kaWNhbCBkaXJlY3RvcnkKIyBwb2xsaW5nIGlzIHVzZWQgaW5zdGVhZC4KaW5vdGlmeSA9IDEKCltyaHNtY2VydGRdCiMgSW50ZXJ2YWwgdG8gcnVuIGNlcnQgY2hlY2sgKGluIG1pbnV0ZXMpOgpjZXJ0Q2hlY2tJbnRlcnZhbCA9IDI0MAojIEludGVydmFsIHRvIHJ1biBhdXRvLWF0dGFjaCAoaW4gbWludXRlcyk6CmF1dG9BdHRhY2hJbnRlcnZhbCA9IDE0NDAKIyBJZiBzZXQgdG8gemVybywgdGhlIGNoZWNrcyBkb25lIGJ5IHRoZSByaHNtY2VydGQgZGFlbW9uIHdpbGwgbm90IGJlIHNwbGF5ZWQgKHJhbmRvbWx5IG9mZnNldCkKc3BsYXkgPSAxCiMgSWYgc2V0IHRvIDEsIHJoc21jZXJ0ZCB3aWxsIG5vdCBleGVjdXRlLgpkaXNhYmxlID0gMAoKW2xvZ2dpbmddCmRlZmF1bHRfbG9nX2xldmVsID0gSU5GTwojIHN1YnNjcmlwdGlvbl9tYW5hZ2VyID0gREVCVUcKIyBzdWJzY3JpcHRpb25fbWFuYWdlci5tYW5hZ2VyY2xpID0gREVCVUcKIyByaHNtID0gREVCVUcKIyByaHNtLmNvbm5lY3Rpb24gPSBERUJVRwojIHJoc20tYXBwID0gREVCVUcKIyByaHNtLWFwcC5yaHNtZCA9IERFQlVHCg==
        filesystem: root
        mode: 0644
        path: /etc/rhsm/rhsm.conf
---
apiVersion: machineconfiguration.openshift.io/v1
kind: MachineConfig
metadata:
  labels:
    machineconfiguration.openshift.io/role: worker
  name: 50-entitlement-pem
spec:
  config:
    ignition:
      version: 2.2.0
    storage:
      files:
      - contents:
          source: data:text/plain;charset=utf-8;base64,BASE64_ENCODED_PEM_FILE
        filesystem: root
        mode: 0644
        path: /etc/pki/entitlement/entitlement.pem
---
apiVersion: machineconfiguration.openshift.io/v1
kind: MachineConfig
metadata:
  labels:
    machineconfiguration.openshift.io/role: worker
  name: 50-entitlement-key-pem
spec:
  config:
    ignition:
      version: 2.2.0
    storage:
      files:
      - contents:
          source: data:text/plain;charset=utf-8;base64,BASE64_ENCODED_PEM_FILE
        filesystem: root
        mode: 0644
        path: /etc/pki/entitlement/entitlement-key.pem
Code language: JavaScript (javascript)
sed "s/BASE64_ENCODED_PEM_FILE/$(base64 -w0 YOUR_ENTITLEMENT.pem)/g" 0003-cluster-wide-machineconfigs.yaml.template > 0003-cluster-wide-machineconfigs.yamlCode language: JavaScript (javascript)oc create -f 0003-cluster-wide-machineconfigs.yaml Code language: CSS (css)At this point it is time to validate the cluster-wide entitlement. You can use the following example Pod:
cat << EOF >> entitlement-test.yaml
apiVersion: v1
kind: Pod
metadata:
 name: cluster-entitled-test-pod
spec:
 containers:
   - name: cluster-entitled-test
     image: registry.access.redhat.com/ubi8:latest
     command: [ "/bin/sh", "-c", "dnf search kernel-devel --showduplicates" ]
 restartPolicy: Never
EOFCode language: JavaScript (javascript)
oc create -f entitlement-test.yaml
oc get pods -n gpu-operator-resourcesCode language: JavaScript (javascript)If your test Pod is in running state you can have a look at its logs. It should look like the following
oc logs cluster-entitled-test-pod -n gpu-operator-resources

// Log output
Updating Subscription Management repositories.
Unable to read consumer identity
Subscription Manager is operating in container mode.
Red Hat Enterprise Linux 8 for x86_64 - AppStre  15 MB/s |  14 MB     00:00
Red Hat Enterprise Linux 8 for x86_64 - BaseOS   15 MB/s |  13 MB     00:00
Red Hat Universal Base Image 8 (RPMs) - BaseOS  493 kB/s | 760 kB     00:01
Red Hat Universal Base Image 8 (RPMs) - AppStre 2.0 MB/s | 3.1 MB     00:01
Red Hat Universal Base Image 8 (RPMs) - CodeRea  12 kB/s | 9.1 kB     00:00
====================== Name Exactly Matched: kernel-devel ======================
kernel-devel-4.18.0-80.1.2.el8_0.x86_64 : Development package for building
                                        : kernel modules to match the kernel
kernel-devel-4.18.0-80.el8.x86_64 : Development package for building kernel
                                  : modules to match the kernel
kernel-devel-4.18.0-80.4.2.el8_0.x86_64 : Development package for building
                                        : kernel modules to match the kernel
kernel-devel-4.18.0-80.7.1.el8_0.x86_64 : Development package for building
                                        : kernel modules to match the kernel
kernel-devel-4.18.0-80.11.1.el8_0.x86_64 : Development package for building
                                         : kernel modules to match the kernel
kernel-devel-4.18.0-147.el8.x86_64 : Development package for building kernel
                                   : modules to match the kernel
kernel-devel-4.18.0-80.11.2.el8_0.x86_64 : Development package for building
                                         : kernel modules to match the kernel
kernel-devel-4.18.0-80.7.2.el8_0.x86_64 : Development package for building
                                        : kernel modules to match the kernel
kernel-devel-4.18.0-147.0.3.el8_1.x86_64 : Development package for building
                                         : kernel modules to match the kernel
kernel-devel-4.18.0-147.0.2.el8_1.x86_64 : Development package for building
                                         : kernel modules to match the kernel
kernel-devel-4.18.0-147.3.1.el8_1.x86_64 : Development package for building
                                         : kernel modules to match the kernelCode language: JavaScript (javascript)
5. Set a ClusterPolicy in place
And now it is time to get the NVIDIA GPU Operator starting its work. It is the last step in your journey on making GPU power consumable in your cluster. Go back to the WebConsole and navigate to
Installed Operators in the side menu.
Click NVIDIA GPU Operator to get to the next page. Navigate to tab ClusterPolicy and click Create ClusterPolicy.

At this page you could set a lot of variables to adjust configuration for the NVIDIA driver. In our case it isn’t necessary, so go straight to the bottom of the page and click Create.

After a short while you should see a bunch of new Pods created by the Operator.
oc get po -n gpu-operator-resources
NAME                                           READY   STATUS      RESTARTS   AGE
pod/nvidia-container-toolkit-daemonset-sgr7h   1/1     Running     0          160m
pod/nvidia-dcgm-exporter-twjx4                 2/2     Running     0          153m
pod/nvidia-device-plugin-daemonset-6tbfv       1/1     Running     0          156m
pod/nvidia-device-plugin-validation            0/1     Completed   0          156m
pod/nvidia-driver-daemonset-m7mwk              1/1     Running     0          160m
pod/nvidia-driver-validation                   0/1     Completed   0          160mCode language: JavaScript (javascript)
To verify the successful installation just wait for nvidia-device-plugin-validation and nvidia-driver-validation Pod to reach status Completed. Their output should look like the following.
oc logs -f nvidia-driver-validation -n gpu-operator-resources

// Log Output
make[1]: Leaving directory '/usr/local/cuda-10.2/cuda-samples/Samples/warpAggregatedAtomicsCG'
make: Target 'all' not remade because of errors.
> Using CUDA Device [0]: Tesla T4
> GPU Device has SM 7.5 compute capability
[Vector addition of 50000 elements]
Copy input data from the host memory to the CUDA device
CUDA kernel launch with 196 blocks of 256 threads
Copy output data from the CUDA device to the host memory
Test PASSED
DoneCode language: JavaScript (javascript)
oc logs-f nvidia-device-plugin-validation -n gpu-operator-resources
// Log Output
make[1]: Leaving directory '/usr/local/cuda-10.2/cuda-samples/Samples/warpAggregatedAtomicsCG'
make: Target 'all' not remade because of errors.
> Using CUDA Device [0]: Tesla T4
> GPU Device has SM 7.5 compute capability
[Vector addition of 50000 elements]
Copy input data from the host memory to the CUDA device
CUDA kernel launch with 196 blocks of 256 threads
Copy output data from the CUDA device to the host memory
Test PASSED
DoneCode language: JavaScript (javascript)Congratulations
At this point you are able to use GPU power for your workloads in OpenShift! Great!