Simplify Your Development Environment and Say Goodbye to VDI!

It works on my machine!
Anybody who has been in the software business for a while and worked on a team with other developers has likely had the “it works on my machine” experience at least a few times. You check some code into source control, another team member pulls down your changes, and a few minutes later they ping you on your collaboration tool of choice to complain that:
- Your change doesn’t work on their machine, or
- The new code broke the build (the tests passed on my machine!), or
- The commit broke the DEV environment
When you work with a team, this can happen for any number of reasons. A few examples that come to mind are:
- Developer workstations have slightly different versions of the underlying framework or runtime.
- Developer workstations may have completely different operating systems (some may use Windows, some MacOS, others may use one of the many Linux distros).
- Developer desktops have different versions of supporting components like databases (PostgreSQL, Mongo, etc..).
- Differences in the versions of Docker or Kubernetes installed each developers’ workstation.
That’s just to name a few! Now, consider that the deployment environments (DEV, TEST, QA, PROD, etc…) are also likely using a different base OS, perhaps a different version of a web server, OpenJDK, Kubernetes, etc… and you have a lot of permutations to deal with. Granted, most of the time things probably work out just fine, but problems that crop up due to such environmental differences are often the hardest to troubleshoot and they always seem to happen at the worst time, don’t they?
There has to be a better way…
Software development lends itself especially well to distributed teams and working from home. Even when everyone is in the same office, having consistency in development environments is incredibly important.
To cope with the rapid transition to remote work, many organizations turned to Virtual Desktop Infrastructure (VDI) in an attempt to standardize development environments and make working from home easier. Although this certainly is a step in the right direction (standard OS, default set of tools installed, etc…), it still feels like a half measure. It’s a bulky solution that doesn’t actually solve the problem of configuration drift, and you still might have many differences between your development environment and your deployment environment.
There must be a better way…
There is… enter Red Hat CodeReady Workspaces, and it’s upstream project – Eclipse Che!
What is CodeReady Workspaces?
In a nutshell, CodeReady Workspaces is a fully supported distribution of the upstream Eclipse Che project. In essence, it is a multi-tenant IDE environment that runs on your OpenShift Container Platform cluster. It also comes with OpenShift Container Platform, so there’s no added subscription or license required to use it.
Ok… but what does that really mean?
It means that you have a workspace server that runs exactly the same no matter where you choose to run OpenShift. Each developer has their own login with their own workspaces (that run as pods) in their own namespace on the cluster. These workspaces are full IDE instances that have your source, language servers, tools, a terminal, and important commands all baked right in. And the best part? All you need to access and use these workspaces is a modern browser. No fancy developer laptop required, and no clunky virtual desktop!
With that in mind, let’s dive in a little deeper to see what the CodeReady Experience is like.
Installing CodeReady Workspaces
The first thing you will need in order to install CodeReady Workspaces is someone with “cluster admin” privileges in your OpenShift 4.x environment. The installation guide is useful for learning about advanced configurations, but for now we will just follow the default installation path.
Installing the Operator
From the OpenShift Administrator UI:
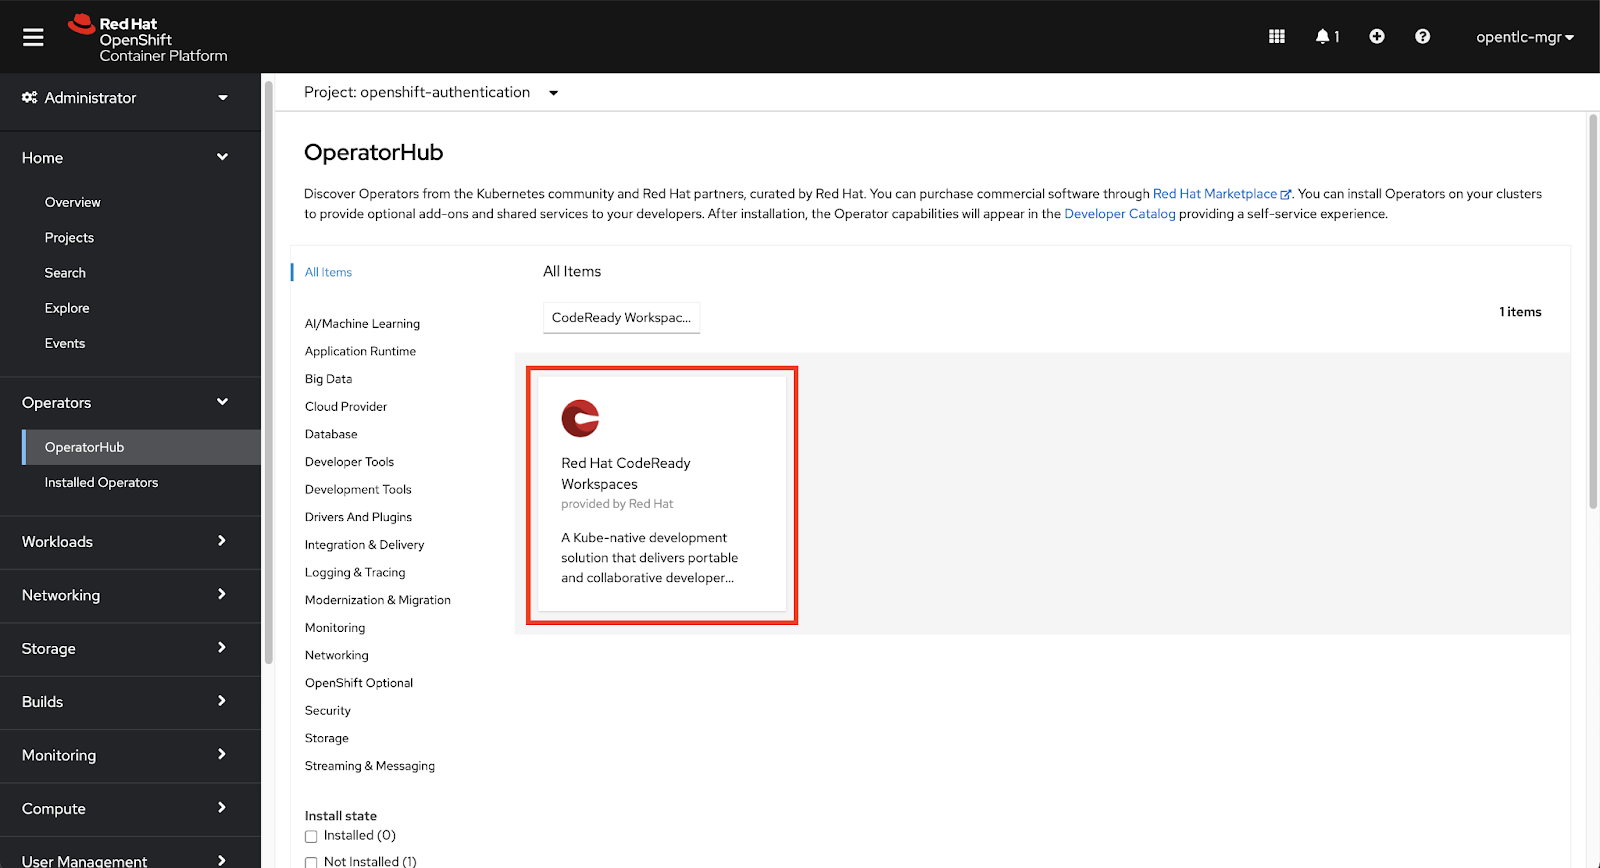
- Select “Operators”, then “OperatorHub” from the left menu.
- Search for “CodeReady Workspaces”
- Click on the “CodeReady Workspaces” operator tile.
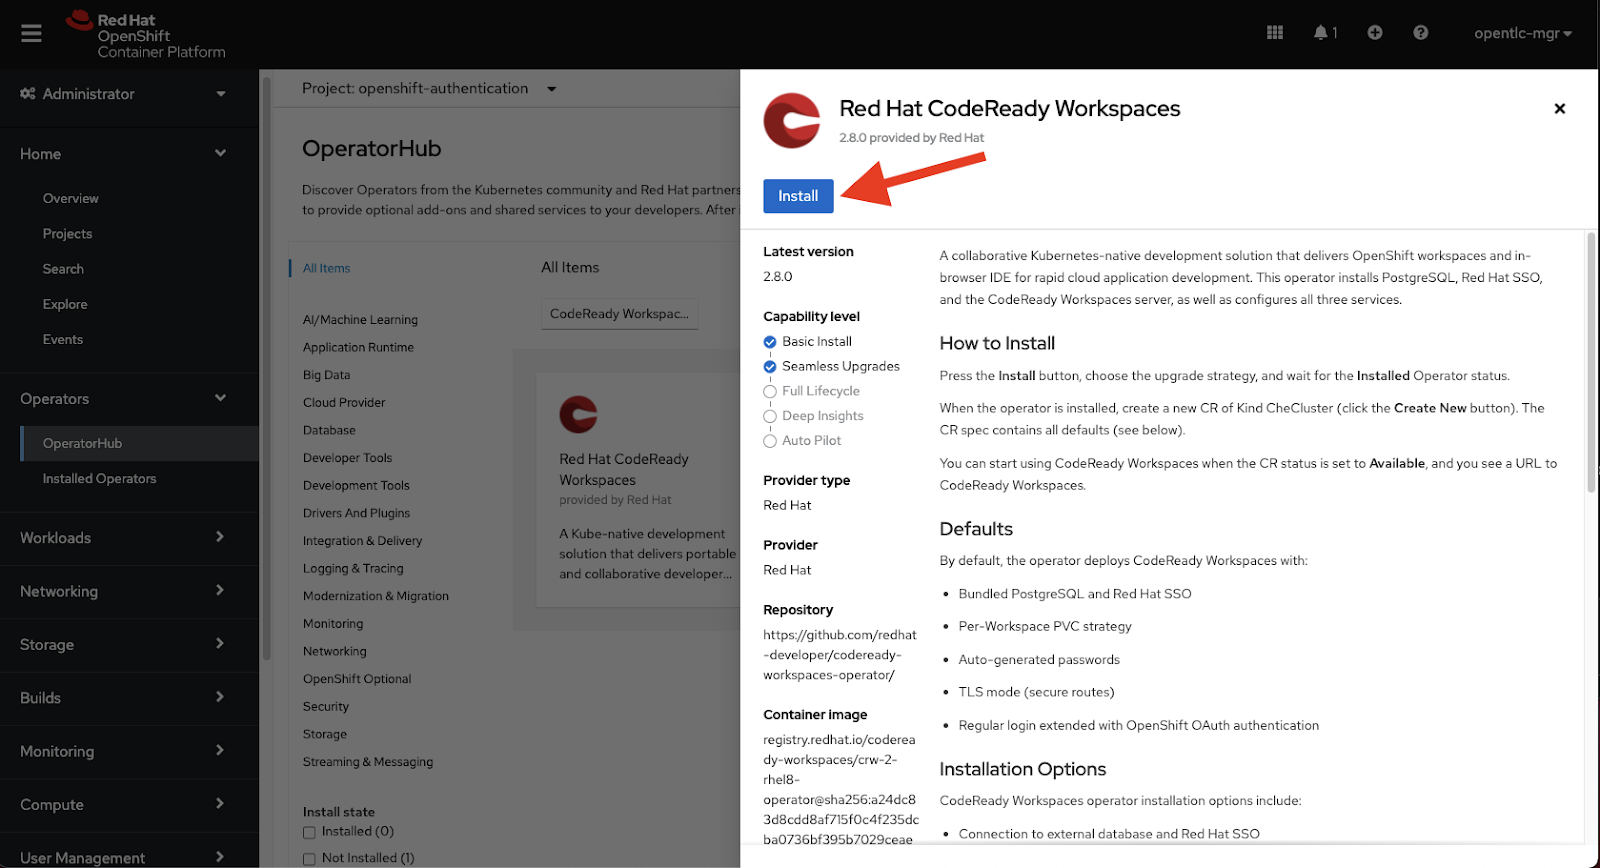
- Next, click the blue “Install” button on the blade that appears.
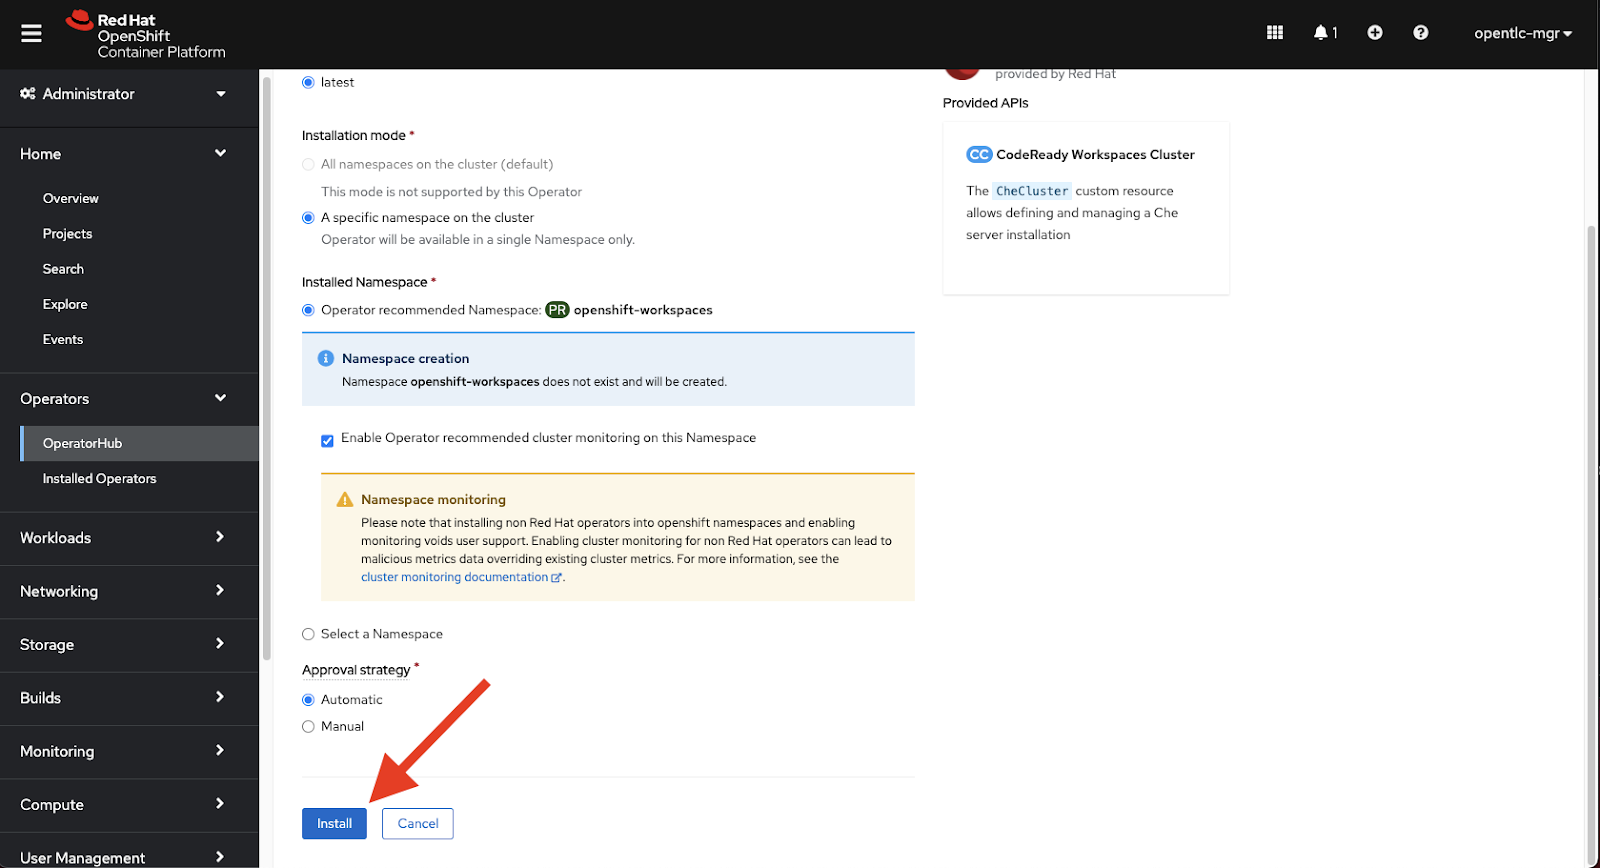
- Finally, accept the default settings and click the “Install” button at the bottom of the screen.
In a minute or two, the CodeReady Workspaces operator will be installed. The function of the operator is to manage the full lifecycle (install, configure, upgrade, delete) of CodeReady Workspaces instances.
Installing CodeReady Workspaces server
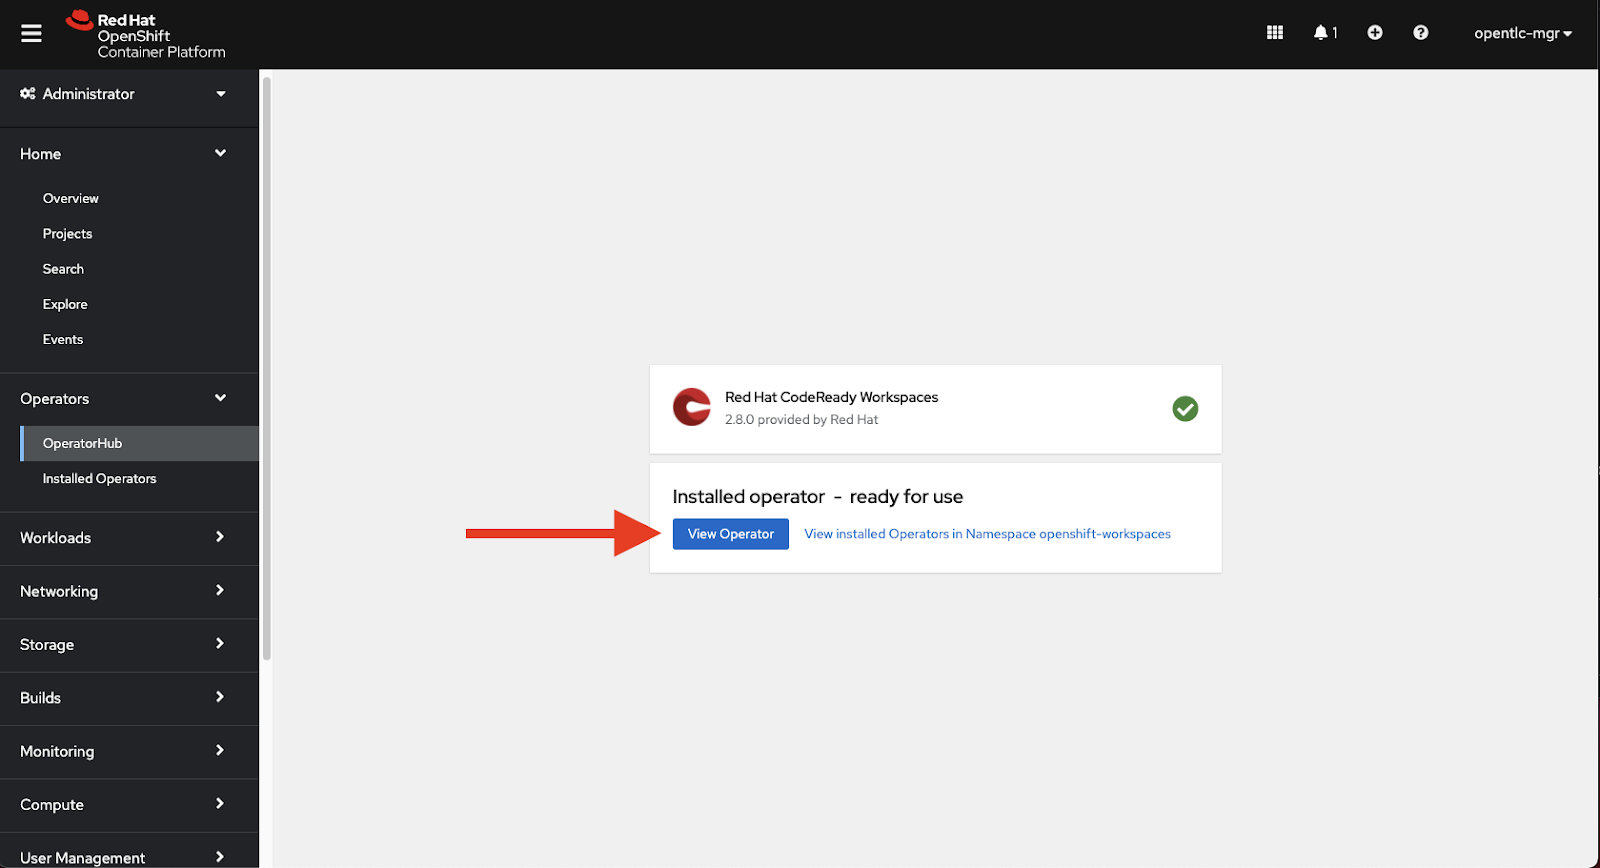
Once the installation of the operator is complete, you will be presented with the option to “View Operator”. Click on this button.
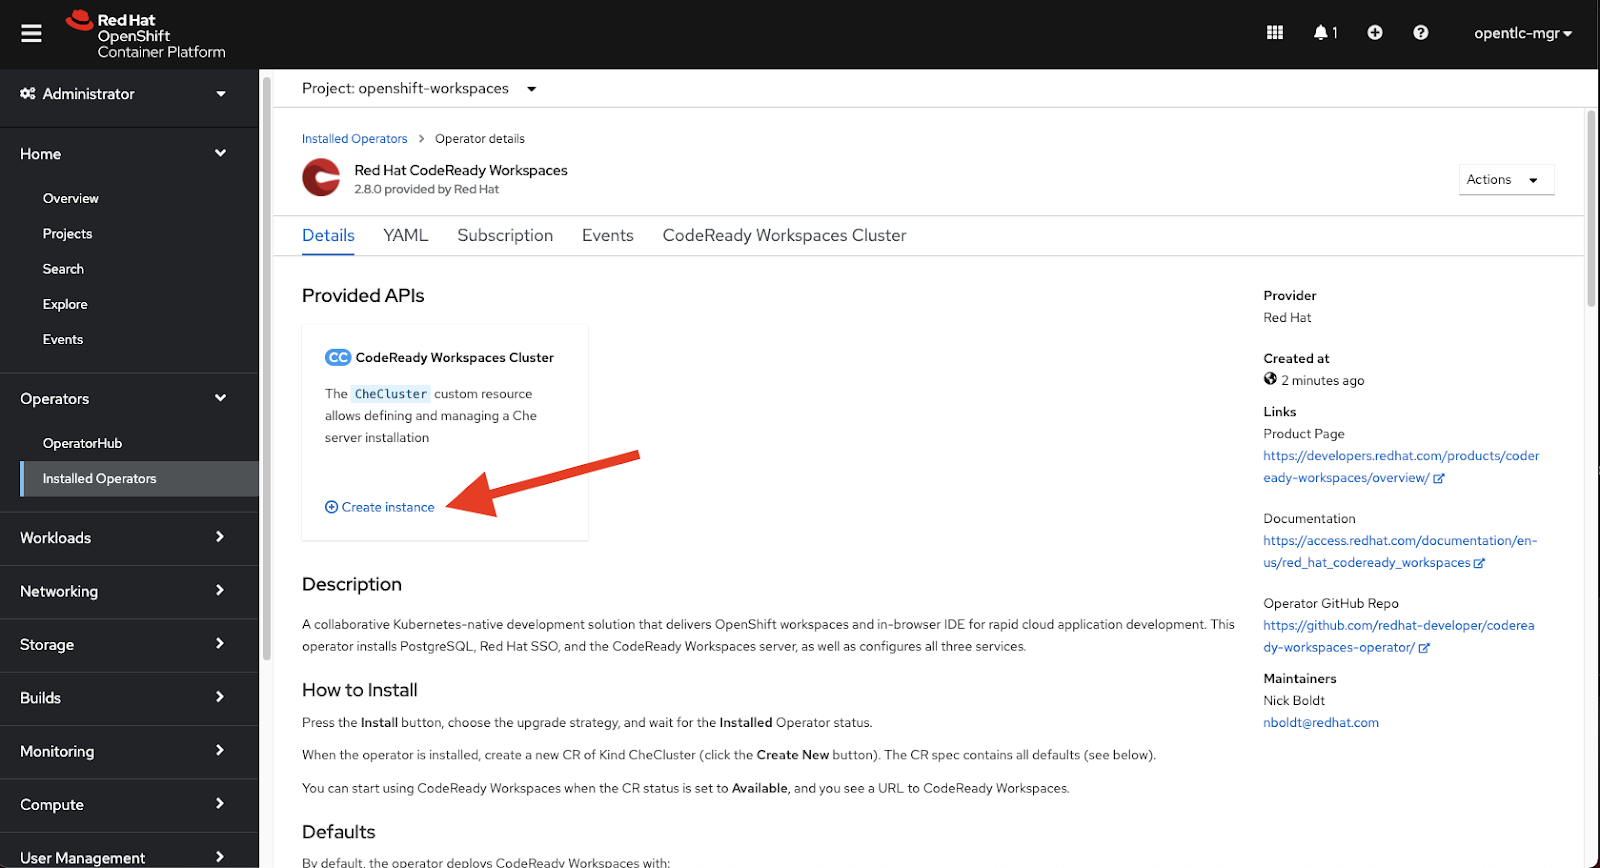
You are now presented with information about CodeReady Workspaces and the components that it will install. For now, we will simply create our instance with the default settings. It’s important to know that there are a lot of configurations that can be made to your CodeReady Workspaces instance. This includes:
- Using an existing instance of Red Hat Single Sign-On for authentication.
- Configuring the number of concurrent workspaces users can have.
- A custom “devfile” registry image (more on this later).
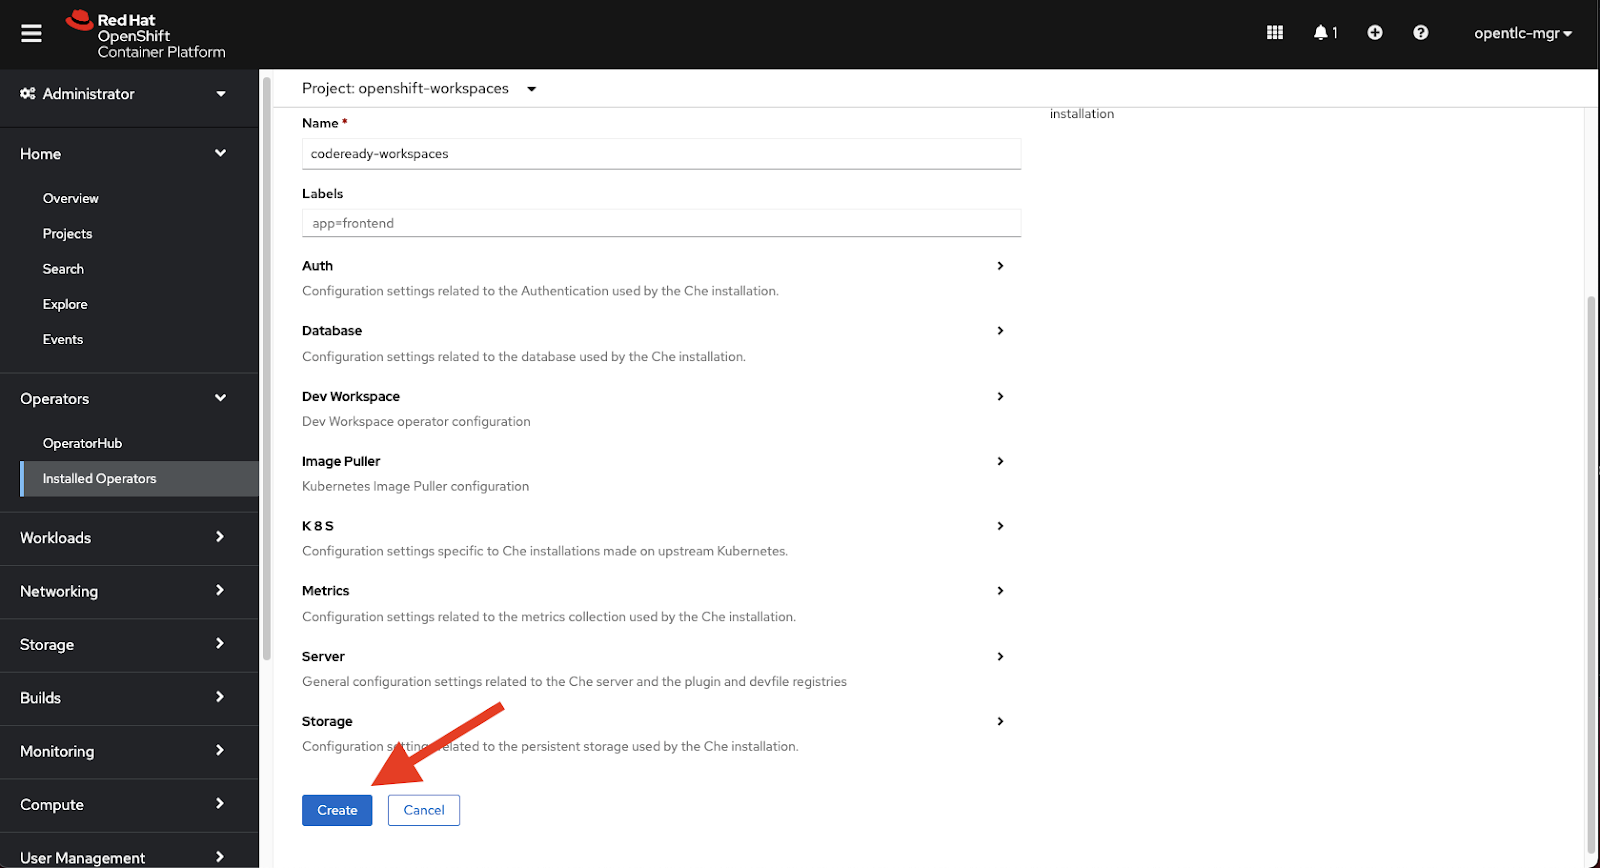
Click on the “Create Instance” link in the CodeReady Workspaces tile, then scroll to the bottom of the following screen and click “Create” to accept the default settings and install your instance.
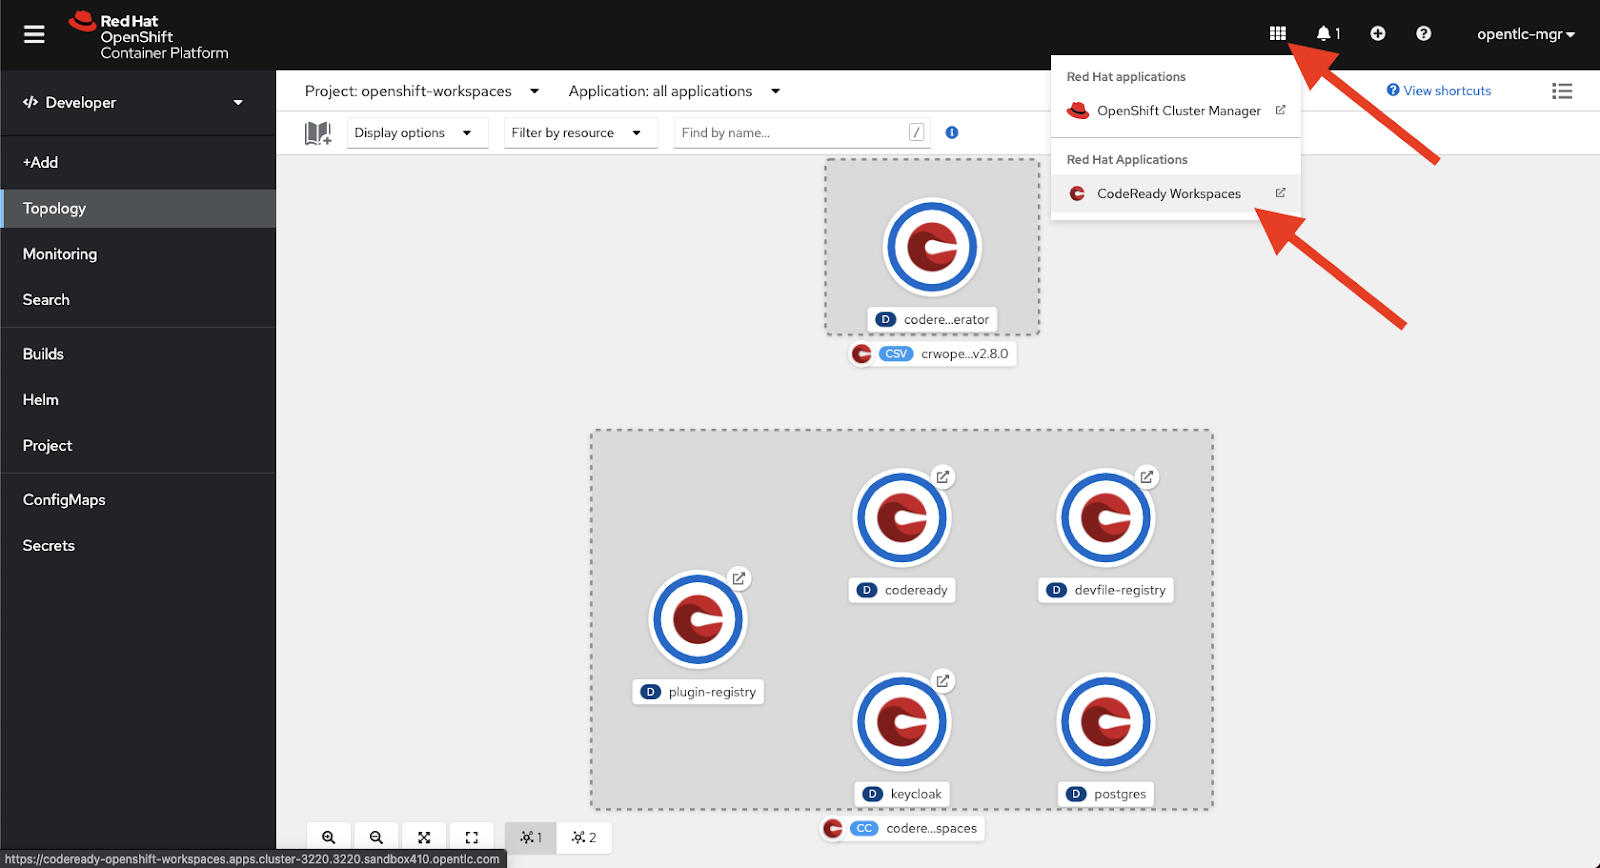
If you change from the “Administrator” to the “Developer” view in OpenShift and click on “Topology” in the left menu, you can watch the different components of your CodeReady Workspaces installation come to life. The entire process will usually take about 3-5 minutes. When it is done, you will have a topology that looks like the following, as well as nice new “CodeReady Workspaces” link added to the quick links menu in the top navigation!
CodeReady Workspaces is now installed! Now, developers with access to your OpenShift cluster will have the ability to have their own cloud-based IDE instance. Let’s see how that looks!
Using CodeReady Workspaces
Now that the boring part is over, it’s time to launch CodeReady Workspaces and see what it can do. Remember that new link available in the quick links menu in the top navigation? Click it to get started.
If it’s your first time using CodeReady Workspaces on this cluster, you will be asked to create a new account. This will be linked to your OpenShift identity. This will only need to be done once.
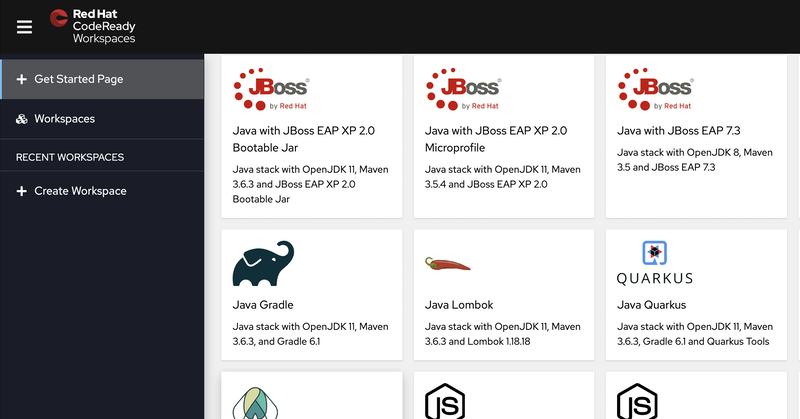
Once that step is complete, you will be presented with the main “Getting Started” screen. Right away, you will notice all the different languages and frameworks that are available to you as a developer. There is Java/Spring Boot, NodeJS, .Net Core, Go… it’s a pretty impressive list. Really, these are just samples and can be used as a way for you to explore the capabilities of CRW so you can make your own custom workspaces.

Exploring the IDE
For now, we will simply jump into the “Quarkus” stack get familiar with the IDE. All you need to do is click on the “Quarkus” tile and your new workspace will start to spin up. It’s worth noting that the first time you use a specific stack it might take a little longer than normal to start. This is because each stack is simply a collection of containers that run in a single workspace pod. There is also an advanced setting to “pre-pull” common workspace images to speed up launch time of workspaces, but that’s an advanced topic for another day!
When your workspace is ready, you will be presented with your IDE. It should looks something like this:
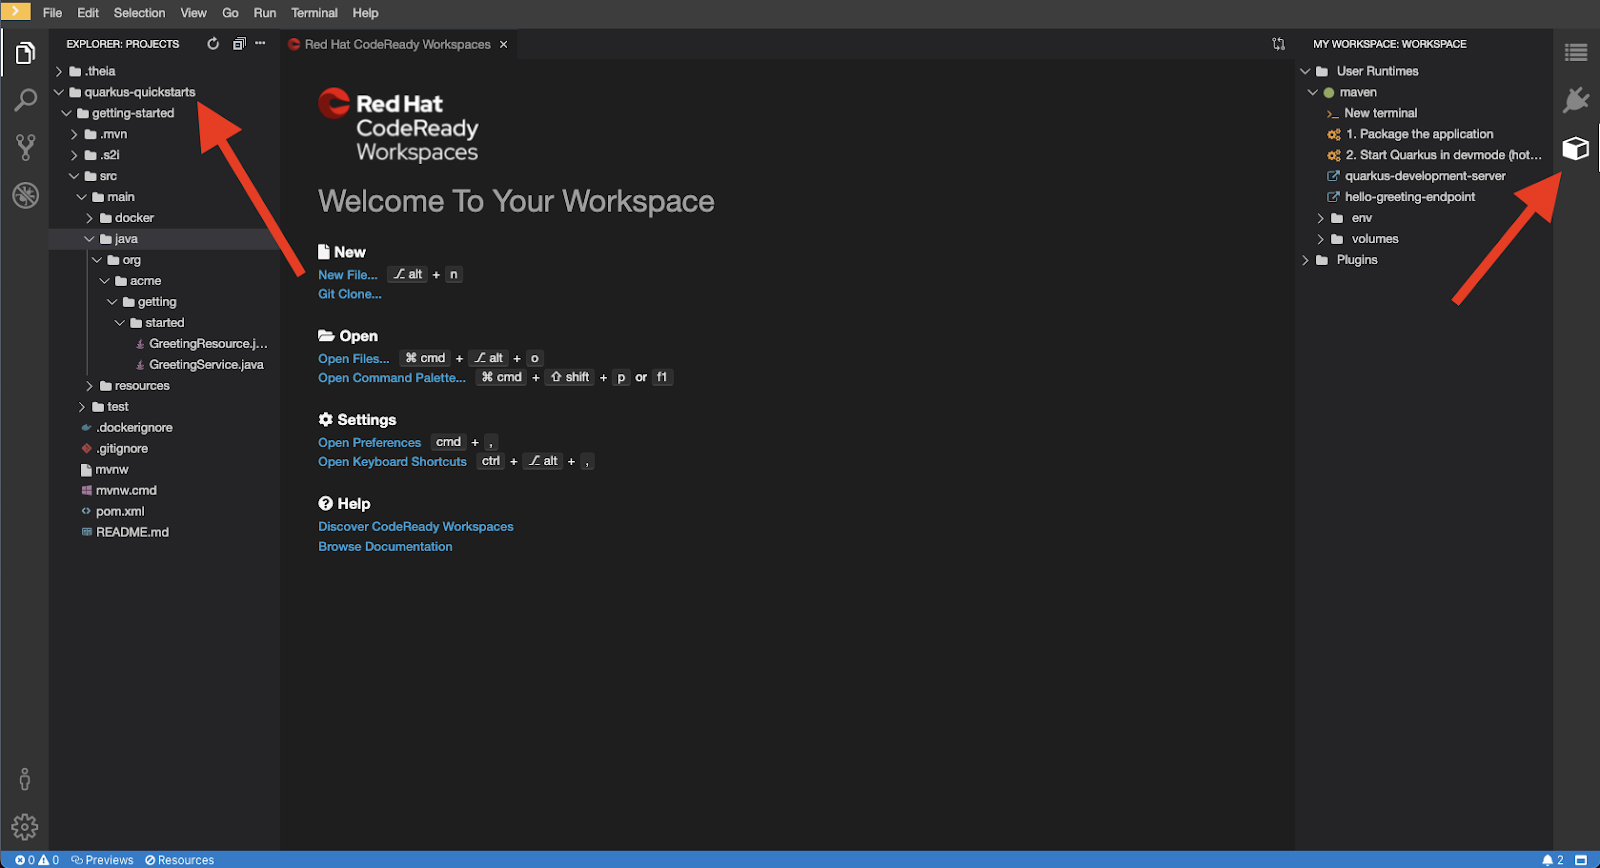
If you are familiar with VS Code, the first thing that will strike you is how similar the UI is. This is not a coincidence! Both VS Code and CodeReady Workspaces share the same Monaco Editor. This familiar look and feel will make anyone who loves VS Code instantly at home in CodeReady Workspaces.
If you take a moment to open some of the directories in the file explorer and browse a few files, you’ll be delighted to find that that code looks like… code! Editing files is snappy and natural, just like if you were using an IDE on your local machine. At first, many people are skeptical of the performance of a web-based IDE and assume there will be terrible lag or a lack of features. I think after using CodeReady Workspaces for a few minutes you will be pleasantly surprised with the experience.
Build and run an application
If you click on the “cube” icon in the right-hand menu, you will see a list of pre-determined commands and the option to open a terminal. Having access to a functional terminal in your IDE can be extremely handy! Not only does this let you run any command you can think of, but it also gives you access to your OpenShift cluster through the “oc” CLI.
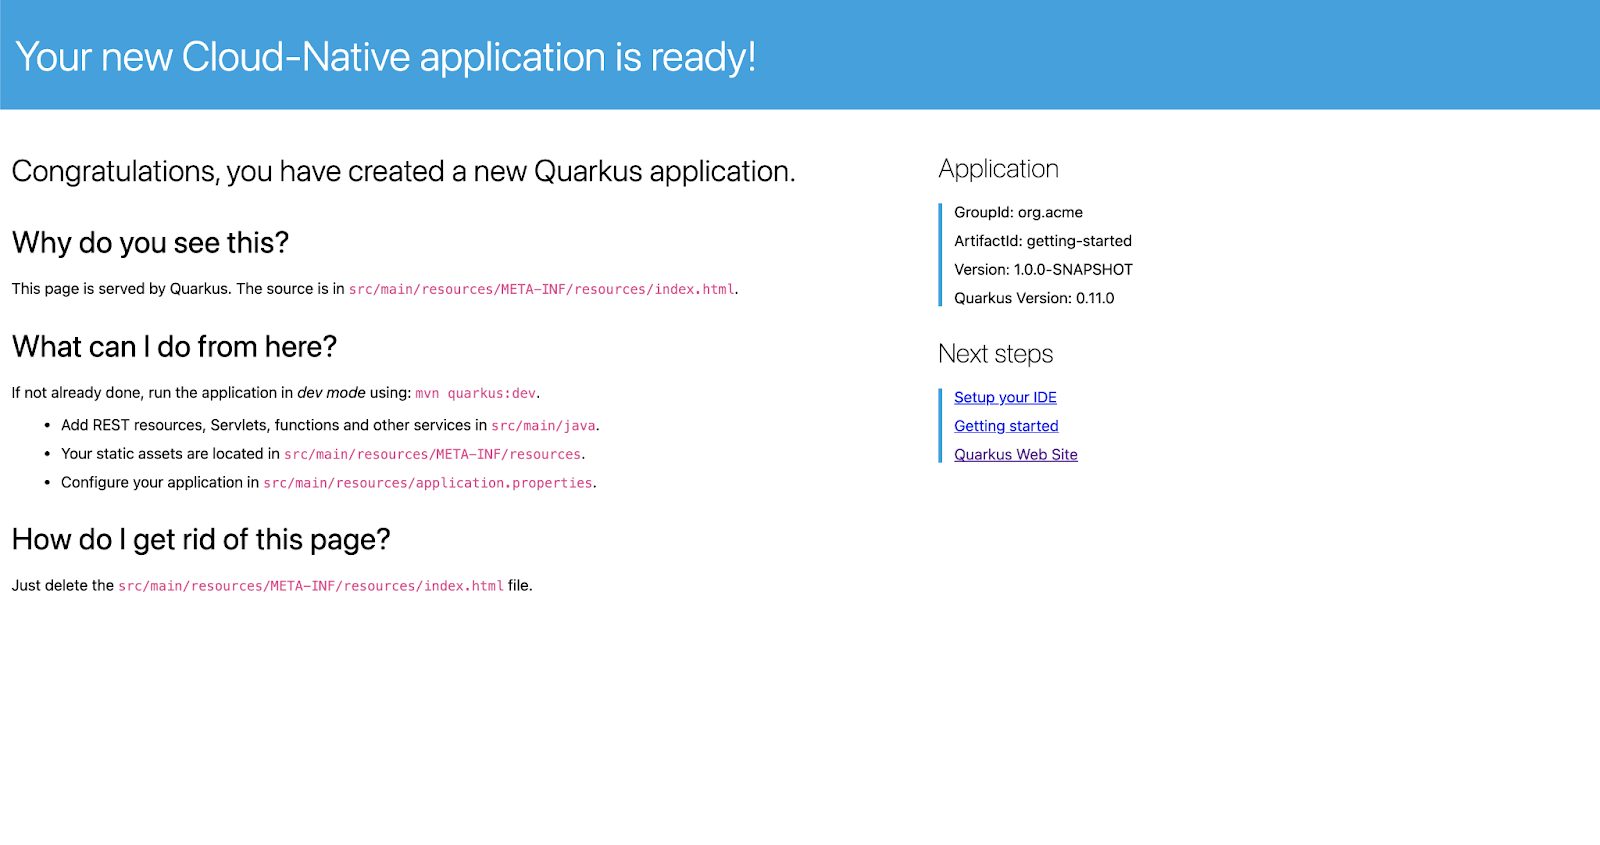
Staying with the command pallet, if you click on the “Start Quarkus in devmode” command, you will see a terminal tab open at the bottom of the screen where you can see the logs being generated by the command you just launched. You can watch as the application builds and then starts. Once the app has launched, you will see a pop-up in the bottom-right of the screen letting you know that there is an application listening on port 8080. Click on “Open in New Tab”. A new tab will open to display the application you’re running in your workspace. Now that is pretty cool.

Since this is a Quarkus app, you can can edit the code and have it live reload. When you’re done, you can click on the terminal tab that is running the Quarkus application to bring focus to that process, then press “Ctrl+c” to kill that process.
Think about what just happened. In just a few minutes you have installed a multi-tenant IDE for dev teams to use, launched a workspace, then built and run an application. All from your browser with no need to install any tooling on your local machine!
Explore the editor for a little while. Take a look at what’s available in the different menus. From the top menu, select “View -> Plugins” to see the list of plugins that you can add to your workspace. Check out the integrated git functionality. CodeReady Workspaces really is a full-fledged IDE that runs on your OpenShift cluster and is available to you through your web browser. No need for a huge developer machine, no need for a clunky VDI developer environment!

As impressive as this is, we still haven’t talked about CodeReady Workspaces killer feature… the “devfile”.
Consistent workspaces for the entire team
Having your workspace server available anywhere that you run OpenShift Container Platform (even in a restricted network) is already a pretty incredible benefit. The consistency and portability this affords is remarkable on its own. However, CodeReady Workspaces has another trick up its sleeve and it’s probably it’s most powerful feature for development teams, the devfile!
Workspace as code
What is a devfile? Essentially, it’s a yaml file that describes your workspace environment. This includes:
- Git repositories that should be cloned on startup.
- The base container (operating system) for the workspace.
- The language servers you want to use.
- The list of IDE plugins that should be included.
- A predefined list of commands that are available to run from the command pallet.
- Other containers that you need in your workspace.
Take a moment to let that sink in. In a single yaml file, you can define everything that you need for your development environment. This way, everyone on the team will be guaranteed to use:
- The same operating system (base image for the workspace stack).
- Versions of the languages and frameworks are consistent.
- Everyone starts with the same plugins.
- A consistent pallet of commands to build, run, debug, and test their applications.
Something that should stand out is the point regarding “Other containers that you need in your workspace”. This is an important feature! Does your application have a database? Include a MySQL container. Do you need a message queue? Include an ActiveMQ Artemis container. Really, the sky is the limit. Since this is all included in one canonical devfile.yaml, you can be sure that everyone on the team is using the same supporting tools – right down to the operating system, database version, and language version.
As an example, here is a devfile for a Spring Boot application that uses a MySQL database. It’s broken up into a few main stanzas, these are:
- Projects – a list of git repositories to include in the workspace.
- Components – languages, tools, and other supporting containers.
- Commands – Common commands for the command pallet.
Take a few minutes to take a look at the different components. I won’t go into depth on the devfile here (that’s another blog post entirely), but it will give you an idea of its power.
That’s pretty cool, but how do you “use” this devfile? How do you instruct CodeReady Workspaces to start a new workspace based on this configuration? With a URL!
Onboard in minutes
When you login to CodeReady Workspaces, the URL in your address bar will look something like:
https://codeready-openshift-workspaces.apps.<cluster url>/dashboard/#/workspacesSimply replace everything after <cluster url> with “/#” followed by either:
- The URL of a git repository that has a “devfile.yaml” in its root directory, or
- A direct link to a devfile.
For this example, I’m going to directly link to the “raw” version of the example devfile above. The URL would look like:
https://codeready-openshift-workspaces.apps.<cluster url>/#https://raw.githubusercontent.com/pittar-blogs/codeready-workspaces/main/java/petclinic-mysql/devfile.yamlWhat’s really cool about this is the fact that you can simply embed this link into the README file for your application, or put it on your project wiki. Have a new developer on the team? As long as they have access to your OpenShift cluster and your git repository, they’re up and running with a properly configured workspace in minutes simply by clicking on the link!
Once you hit that link, you will be presented with a screen letting you know your workspaces is being created based on the devfile you have specified.

A minute or two later, you’ll be ready to code, test, and run the app locally. Notice that this workspace is also configured to have its own MySQL instance? That is awesome!

By now you are likely starting to see the potential of a tool like this. Each project can have a full stack of tools, configurations, git repositories, and commands statically defined. Developers can jump straight into developing simply by clicking on a link from a README or in project documentation. Need to support a Java stack, a .Net stack, and PHP development? No problem! Simply create devfiles for each configuration! No need to have different VMs setup and no need to try to make sure everyone has all the same tools, languages, and versions of each on their desktop. From the comfort and safety of your browser, you can switch between any of these stacks in a minute or two.
This is really just scratching the surface of the potential of CodeReady Workspaces. Remember that first menu you saw when you logged in with all the different sample stacks? You can customize that! You can add your own configurations (surprise, they’re just devfiles!) and remove the samples that you don’t want cluttering up the Getting Started page. A deeper dive on customizing the default devfile registry and advanced devfile configurations might just require a follow up blog post if there is interest.
Wrapping It All Up
Having a light weight workspace running in your OpenShift cluster that looks and feels like VS Code is pretty impressive. If you are using the upstream OKD, or a different Kubernetes distribution, you’re still in luck! You can have a very similar experience with the upstream Eclipse Che project. You just won’t have the benefit if Red Hat Enterprise Linux-based stacks or official Red Hat support.
So what are you waiting for? As you can see, getting started with Red Hat CodeReady Workspaces is incredibly easy, so go get coding!