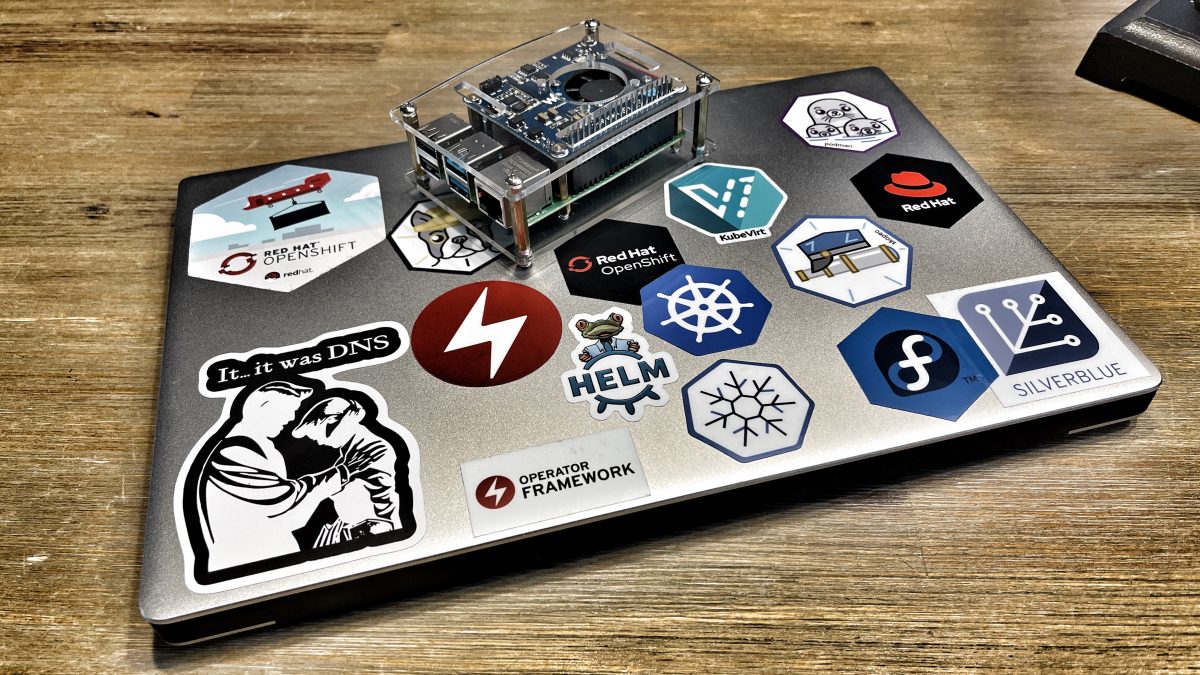
Almost! We run MicroShift on a Raspberry Pi4. MicroShift is an experimental flavour of OpenShift/Kubernetes optimized for the device edge. It targets the niche between minimal, standalone Linux edge devices and full-fledged OpenShift/Kubernetes edge clusters.
You can find more details about MicroShift at https://next.redhat.com/project/microshift/
MicroShift is a research project being worked on upstream in the community and not (yet?) available as a product from Red Hat as a supported product.
As an operating system for the Raspberry Pi4, I decided to use the Fedora IoT release which is an upstream project for Red Hat Enterprise Linux for Edge (Short: RHEL for Edge). RHEL for Edge and Fedora IoT are OSTree based Linux distributions providing an immutable operating system with atomic updates.
For a real Edge use case I recommend looking into other features of RHEL for Edge and Fedora IoT too:
- Automating Image/operating system Roll Back with Greenboot
- Focus on security is built-in: Support for TPM2, SecureBoot, automated storage decryption with Clevis.
Why is this important? It might be the case: the access to your Edge devices is not as protected as the access to your server in the datacenter.
If you want to learn more about the RHEL for Edge, here a couple of short Introduction videos:
- RHEL for Edge Part 1: Creating an Image (8min)
- RHEL for Edge Part 2: Installing an Image (3min)
- RHEL for Edge Part 3: Updating an Image (6min)
- RHEL for Edge Part 4: Manually Rolling Back an Image (2min)
- RHEL for Edge Part 5: Automating Image Roll Back with Greenboot (6min)
- RHEL for Edge Part 6: Configuring Automatic Updates (4min)
- RHEL for Edge Part 7: rpm-ostree Filesystem (12min)
Or in case you want to know more in general about Fedora IoT. I can recommend the talk “What’s Fedora IoT?” (Slides).
In this blog post we are going through different steps:
- Installation and configuration of Fedora IoT on Raspberry Pi 4
- Deploying MicroShift on Fedora IoT
- Configure own certificates for OpenShift ingress
- Deploy an example application.
- Update Fedora IoT together with MicroShift.
Installation and Configuration of Fedora IoT
on Raspberry Pi 4
The installation of an operating system on Raspberry Pi 4 hardware means you have to copy the operating system onto an sd card.
For these steps, I use my Fedora 34 workstation which I basically follow the instructions from our official Fedora IoT documentation: Create a Bootable SD Card.
If you want to prepare your sd card on Windows or MacOS, please use your favourite sd card flash tool like the Raspberry Pi Imager or balenaEtcher. To add your ssh-key on the Fedora IoT you have to use Zezere: Setting up a Device with Zezere
Here are my steps:
Step 1) Download Fedora IoT Raw Image for aarch64 from https://getfedora.org/en/iot/download/
Step 2) Check the device of your sd card:
$ udisksctl status
MODEL                     REVISION  SERIAL               DEVICE
--------------------------------------------------------------------------
SAMSUNG MZVLW256HEHP-000L7 4L7QCXB7  S35ENX0J796546       nvme0n1
Generic- SD/MMC           1.00      20120501030900000    sda
In my case the device is /dev/sda.
Step 3) Create an ssh key with ssh-keygen or use an existing one.
Step 4) Use arm-image-installer to copy the data to your sd card:
# Install arm-image-installer
$ dnf install arm-image-installerCode language: PHP (php)
Run the arm-image-installer:
To explain the arguments:
arm-image-installer \
  --target=rpi4 \ # => Target device, in my case Raspberry Pi4
  --image=Fedora-IoT-35-20211101.0.aarch64.raw.xz  \ # => File from Step 1.
  --addkey=id_ed25519.pub \  # => SSH Public key from Step 3.
  --media=/dev/sda           # => Media device from Step 2.Code language: PHP (php)
Update on 2022-03-08: If you want to avoid resizing partition afterwards you can add --resizefs
Here is my output:
$ arm-image-installer \
  --target=rpi4 \
  --image=Fedora-IoT-35-20211101.0.aarch64.raw.xz  \
  --addkey=id_ed25519.pub --media=/dev/sda

=====================================================
= Selected Image:
= Fedora-IoT-35-20211101.0.aarch64.raw.xz
= Selected Media : /dev/sda
= U-Boot Target : rpi4
= SSH Public Key id_ed25519.pub will be added.
=====================================================

*****************************************************
*****************************************************
******** WARNING! ALL DATA WILL BE DESTROYED ********
*****************************************************
*****************************************************

 Type 'YES' to proceed, anything else to exit now

= Proceed? YES
= Writing:
= Fedora-IoT-35-20211101.0.aarch64.raw.xz
= To: /dev/sda ....
4255186944 bytes (4.3 GB, 4.0 GiB) copied, 49 s, 86.8 MB/s
0+495483 records in
0+495483 records out
4294967296 bytes (4.3 GB, 4.0 GiB) copied, 64.1439 s, 67.0 MB/s
= Writing image complete!
= Raspberry Pi 4 Uboot is already in place, no changes needed.
= Adding SSH key to authorized keys.
= NOTE: System Relabel required on first boot.
= SELinux relabel not supported on IoT images.

= Installation Complete! Insert into the rpi4 and boot.Code language: JavaScript (javascript)
Update 2022-03-8: If you want to use an NVMe via USB you have to use the latest UEFI Firmware. If you use a Raspberry Pi 4 with more than 3 GB of RAM do not forget to enable the support for more than 3 GB of ram: https://github.com/pftf/RPi4#initial-notice.
Download the latest release from: https://github.com/pftf/RPi4/releases/
$ sudo mount /dev/sda1 /mnt/sda1/
$ cd /mnt/sda1/
# Download from https://github.com/pftf/RPi4/releases/ - pick the latest release
# curl -L -O https://github.com/pftf/RPi4/releases/download/v1.32/RPi4_UEFI_Firmware_v1.32.zip
$ sudo unzip /home/rbohne/Downloads/RPi4_UEFI_Firmware_v1.32.zip
Archive:  /home/rbohne/Downloads/RPi4_UEFI_Firmware_v1.32.zip
  inflating: RPI_EFI.fd
replace bcm2711-rpi-4-b.dtb? [y]es, [n]o, [A]ll, [N]one, [r]ename: A
  inflating: bcm2711-rpi-4-b.dtb
  inflating: bcm2711-rpi-400.dtb
  inflating: bcm2711-rpi-cm4.dtb
  inflating: config.txt
  inflating: fixup4.dat
  inflating: start4.elf
  inflating: overlays/miniuart-bt.dtbo
  inflating: Readme.md
   creating: firmware/
   creating: firmware/brcm/
  inflating: firmware/brcm/brcmfmac43455-sdio.txt
  inflating: firmware/brcm/brcmfmac43455-sdio.bin
  inflating: firmware/brcm/brcmfmac43455-sdio.clm_blob
  inflating: firmware/brcm/brcmfmac43455-sdio.Raspberry
  inflating: firmware/Readme.txt
  inflating: firmware/LICENCE.txt
$ cd
$ sudo umount /dev/sda1Code language: PHP (php)
Now it’s time to plug the sd card into your Raspberry Pi4 and boot Fedora IoT for the first time.
After successful boot, you can try to log in via ssh. By default the network configuration is done via DHCP, so please find out the IP address in your local environment, in my case, it is: 192.168.1.115
ssh -l root 192.168.1.115
Warning: Permanently added '192.168.1.115' (ED25519) to the list of known hosts.
Boot Status is GREEN - Health Check SUCCESS
Last login: Wed Dec  1 07:21:37 2021 from 192.168.1.92
[root@p200300cfaf07d500c73722aece5bd6e0 ~]# uname -a
Linux p200300cfaf07d500c73722aece5bd6e0.dip0.t-ipconnect.de 5.14.10-300.fc35.aarch64 #1 SMP Thu Oct 7 20:32:40 UTC 2021 aarch64 aarch64 aarch64 GNU/Linux
[root@p200300cfaf07d500c73722aece5bd6e0 ~]# free -m
               total        used        free      shared  buff/cache   available
Mem:            7825         185        7453           8         186        7531
Swap:           7824           0        7824
[root@p200300cfaf07d500c73722aece5bd6e0 ~]# lscpu
Architecture:            aarch64
  CPU op-mode(s):        32-bit, 64-bit
  Byte Order:            Little Endian
CPU(s):                  4
  On-line CPU(s) list:   0-3
Vendor ID:               ARM
  BIOS Vendor ID:        Unknown
  Model name:            Cortex-A72
    BIOS Model name:     Unknown
    Model:               3
    Thread(s) per core:  1
    Core(s) per cluster: 4
    Socket(s):           1
    Cluster(s):          1
    Stepping:            r0p3
    CPU max MHz:         1500.0000
    CPU min MHz:         600.0000
    BogoMIPS:            108.00
    Flags:               fp asimd evtstrm crc32 cpuid
NUMA:
  NUMA node(s):          1
  NUMA node0 CPU(s):     0-3
Vulnerabilities:
  Itlb multihit:         Not affected
  L1tf:                  Not affected
  Mds:                   Not affected
  Meltdown:              Not affected
  Spec store bypass:     Vulnerable
  Spectre v1:            Mitigation; __user pointer sanitization
  Spectre v2:            Vulnerable
  Srbds:                 Not affected
  Tsx async abort:       Not affected
[root@p200300cfaf07d500c73722aece5bd6e0 ~]# lsblk
NAME        MAJ:MIN RM  SIZE RO TYPE MOUNTPOINTS
mmcblk0     179:0    0 59.5G  0 disk
├─mmcblk0p1 179:1    0  501M  0 part /boot/efi
├─mmcblk0p2 179:2    0    1G  0 part /boot
└─mmcblk0p3 179:3    0  2.5G  0 part /var
                                     /usr
                                     /
                                     /sysroot
zram0       252:0    0  7.6G  0 disk [SWAP]
[root@p200300cfaf07d500c73722aece5bd6e0 ~]# Code language: PHP (php)
Let’s start the configuration of our Fedora IoT installation:
- Configure proper Hostname
- Resize partition to use the whole sd card – in my case 64 GB.
- Update Fedora IoT to the latest version/packages.
Configure proper Hostname
Quite easy to run following these commands:
hostnamectl hostname microshift
echo "127.0.0.1 microshift" >> /etc/hostsCode language: JavaScript (javascript)
Resize partition to use the whole sd card
First, we have to resize the third partition with parted and then we have to resize the file system on the partition. Here are my steps:
Step 1) Resize partition
[root@p200300cfaf07d500c73722aece5bd6e0 ~]# parted
GNU Parted 3.4
Using /dev/mmcblk0
Welcome to GNU Parted! Type 'help' to view a list of commands.
(parted) p
Model: SD SN64G (sd/mmc)
Disk /dev/mmcblk0: 63.9GB
Sector size (logical/physical): 512B/512B
Partition Table: msdos
Disk Flags:

Number  Start   End     Size    Type     File system  Flags
 1      1049kB  526MB   525MB   primary  fat16        boot
 2      526MB   1600MB  1074MB  primary  ext4
 3      1600MB  4294MB  2694MB  primary  ext4

(parted) resizepart 3
Warning: Partition /dev/mmcblk0p3 is being used. Are you sure you want to continue?
Yes/No? Yes
End?  [4294MB]? 63.9GB
(parted) p
Model: SD SN64G (sd/mmc)
Disk /dev/mmcblk0: 63.9GB
Sector size (logical/physical): 512B/512B
Partition Table: msdos
Disk Flags:

Number  Start   End     Size    Type     File system  Flags
 1      1049kB  526MB   525MB   primary  fat16        boot
 2      526MB   1600MB  1074MB  primary  ext4
 3      1600MB  63.9GB  62.3GB  primary  ext4

(parted) quitCode language: PHP (php)
Step 2) Resize file system
[root@p200300cfaf07d500c73722aece5bd6e0 ~]# resize2fs /dev/mmcblk0p3
resize2fs 1.46.3 (27-Jul-2021)
Filesystem at /dev/mmcblk0p3 is mounted on /sysroot; on-line resizing required
old_desc_blocks = 1, new_desc_blocks = 8
The filesystem on /dev/mmcblk0p3 is now 15201280 (4k) blocks long.Code language: PHP (php)
Update Fedora IoT to the latest version/packages.
Upgrade the system
# rpm-ostree upgradeCode language: PHP (php)Reboot, to boot into the new version of Fedora IoT.
Deploying MicroShift on Fedora IoT
Deploying MicroShift is very easy, there are two methods available:
- running containerized – via Podman & Systemd
- Installing via RPM and running via Systemd
Together with Fedora IoT I decided to go with the RPM method. I basically followed the official documentation and adapted the steps to Fedora IoT.
Step 1) Configure the necessary RPM repositories
curl -L -o /etc/yum.repos.d/fedora-modular.repo https://src.fedoraproject.org/rpms/fedora-repos/raw/rawhide/f/fedora-modular.repo
curl -L -o /etc/yum.repos.d/fedora-updates-modular.repo https://src.fedoraproject.org/rpms/fedora-repos/raw/rawhide/f/fedora-updates-modular.repo
curl -L -o /etc/yum.repos.d/group_redhat-et-microshift-fedora-35.repo https://copr.fedorainfracloud.org/coprs/g/redhat-et/microshift/repo/fedora-35/group_redhat-et-microshift-fedora-35.repoCode language: JavaScript (javascript)
Step 2) Enable the CRI dnf module
rpm-ostree ex module enable cri-o:1.21Code language: JavaScript (javascript)Step 3) Install the RPM’s
rpm-ostree install cri-o cri-tools microshiftStep 4) Reboot into the new Version with updated RPM packages
systemctl rebootStep 5) Install OpenShift and Kubernetes clients
curl -# -L -o /tmp/openshift-client-linux.tar.gz https://mirror.openshift.com/pub/openshift-v4/aarch64/clients/ocp/stable-4.9/openshift-client-linux.tar.gz \
 && tar xzvf /tmp/openshift-client-linux.tar.gz -C /usr/local/bin/ oc kubectl \
 && chmod +x /usr/local/bin/oc /usr/local/bin/kubectl \
 && rm /tmp/openshift-client-linux.tar.gzCode language: PHP (php)
Step 6) Configure firewalld
systemctl enable firewalld --now
firewall-cmd --zone=public --add-port=6443/tcp --permanent
firewall-cmd --zone=public --add-port=80/tcp --permanent
firewall-cmd --zone=public --add-port=443/tcp --permanent
firewall-cmd --reloadCode language: PHP (php)
Step 7) Configure MicroShift – Optional
If you like you can create a MicroShift config. Below you can see my one:
mkdir /etc/microshift/
cat - > /etc/microshift/config.yaml <<EOF
cluster:
  url: https://192.168.66.4:6443
  domain: microshift.openshift.pub
EOFCode language: JavaScript (javascript)
Configuration:
- url: Configure my internal IP for Kubernetes API Server. Default is 127.0.0.1:6443
- domain: Configure the default wildcard domain. In my example, all automatic generated hostnames in routes looks like “<router-name>-<namespace>.microshift.openshift.pub
Default is cluster.local
Step 8 ) Start MicroShift
Now it’s time to enable and start crio and MicroShift
systemctl enable --now crio microshiftStep 9) Verify MicroShift
After a while, you can connect to your MicroShift instance:
[root@microshift ~]# export  KUBECONFIG=/var/lib/microshift/resources/kubeadmin/kubeconfig
[root@microshift ~]# oc get nodes -o wide
NAME         STATUS   ROLES    AGE     VERSION   INTERNAL-IP    EXTERNAL-IP   OS-IMAGE                                   KERNEL-VERSION            CONTAINER-RUNTIME
microshift   Ready    <none>   3m47s   v1.21.0   192.168.66.4   <none>        Fedora Linux 35.20211212.1 (IoT Edition)   5.15.6-200.fc35.aarch64   cri-o://1.21.3
[root@microshift ~]# oc get pods -A
NAMESPACE                       NAME                                  READY   STATUS    RESTARTS   AGE
kube-system                     kube-flannel-ds-cvlt2                 1/1     Running   0          2m46s
kubevirt-hostpath-provisioner   kubevirt-hostpath-provisioner-ftpx4   1/1     Running   0          56s
openshift-dns                   dns-default-6rgt7                     2/2     Running   0          2m46s
openshift-dns                   node-resolver-ql8kq                   1/1     Running   0          2m46s
openshift-ingress               router-default-85bcfdd948-v9jfg       1/1     Running   0          2m50s
openshift-service-ca            service-ca-76674bfb58-jzh46           1/1     Running   0          64s
[root@microshift ~]#Code language: PHP (php)
Configure your own certificates for OpenShift ingress
By default, the ingress uses a self-signed certificate signed by the internal service CA signer. If you want to use another certificate here are the steps. In my case, I created a certificate with Lets-Encrypt.
Step 1) Copy the certificates on the MicroShift node and create a secret
[root@microshift ~]# oc create secret \
  -n openshift-ingress tls letsencrypt \
  --cert=cert.crt --key=cert.key
secret/letsencrypt createdCode language: PHP (php)
Step 2) Replace the certificate secret of the MicroShift deployment
[root@microshift ~]# oc set volumes \
  -n openshift-ingress deployment/router-default \
  --add --name=default-certificate \
  --secret-name=letsencrypt --overwrite
deployment.apps/router-default volume updatedCode language: PHP (php)
The openshift-ingress pods should be deployed with your certificate.
Deploy an example application.
Let’s deploy an example application.
Step 1) Create a new project / namespace:
[root@microshift ~]# oc new-project demo-app
Now using project "demo-app" on server "https://192.168.66.4:6443".

You can add applications to this project with the 'new-app' command. For example, try:

    oc new-app rails-postgresql-example

to build a new example application in Ruby. Or use kubectl to deploy a simple Kubernetes application:

    kubectl create deployment hello-node --image=k8s.gcr.io/serve_hostnameCode language: PHP (php)
Step 2) Apply a simple deployment, service and route
[root@microshift ~]# oc apply -f https://gist.githubusercontent.com/rbo/54b216b53d7f93de9631ca6a4359661c/raw/8dbec50e65ea811e5494d17e2d3571fd65d1e016/deploy.yaml
deployment.apps/simple-nginx created
service/simple-nginx created
route.route.openshift.io/simple-nginx createdCode language: PHP (php)
Step 3) Verify the deployment
[root@microshift ~]# oc get routes
NAME           HOST/PORT                                        PATH   SERVICES       PORT   TERMINATION     WILDCARD
simple-nginx   simple-nginx-demo-app.microshift.openshift.pub          simple-nginx   8080   edge/Redirect   None
[root@microshift ~]# curl https://simple-nginx-demo-app.microshift.openshift.pub/
Greetings from MicroShiftCode language: PHP (php)
And now it’s your turn to deploy your favourite application.
Update Fedora IoT together with MicroShift.
After a while, you may want to update your Fedora IoT together with MicroShift to apply some security patches and/or bug fixes with the newest MicroShift RPMs. Thanks to OSTree, this is quite easy and simple to run via an rpm-ostree update and reboot of the node into the new version.
Here my details:
[root@microshift ~]# rpm-ostree status
State: idle
Deployments:
● fedora-iot:fedora/stable/aarch64/iot
                   Version: 35.20211212.1 (2021-12-12T21:08:43Z)
                BaseCommit: 6e5da88473ff059d6fb9bc11a39ad2610474178a16b0397ef56f697569f86efd
              GPGSignature: Valid signature by 8C5BA6990BDB26E19F2A1A801161AE6945719A39
           LayeredPackages: cri-o cri-tools microshift
            EnabledModules: cri-o:1.21

  fedora-iot:fedora/stable/aarch64/iot
                   Version: 35.20211212.1 (2021-12-12T21:08:43Z)
                BaseCommit: 6e5da88473ff059d6fb9bc11a39ad2610474178a16b0397ef56f697569f86efd
              GPGSignature: Valid signature by 8C5BA6990BDB26E19F2A1A801161AE6945719A39
            EnabledModules: cri-o:1.21
[root@microshift ~]# rpm-ostree update
2 metadata, 0 content objects fetched; 788 B transferred in 2 seconds; 0 bytes content written
Checking out tree f0d89c6... done
Enabled rpm-md repositories: fedora-modular updates fedora copr:copr.fedorainfracloud.org:group_redhat-et:microshift fedora-cisco-openh264 updates-modular
Importing rpm-md... done
rpm-md repo 'fedora-modular' (cached); generated: 2021-10-26T05:06:57Z solvables: 1263
rpm-md repo 'updates' (cached); generated: 2021-12-27T00:29:53Z solvables: 13066
rpm-md repo 'fedora' (cached); generated: 2021-10-26T05:31:21Z solvables: 56722
rpm-md repo 'copr:copr.fedorainfracloud.org:group_redhat-et:microshift' (cached); generated: 2021-12-23T10:47:01Z solvables: 12
rpm-md repo 'fedora-cisco-openh264' (cached); generated: 2021-09-21T18:07:30Z solvables: 4
rpm-md repo 'updates-modular' (cached); generated: 2021-12-18T01:49:07Z solvables: 1364
Resolving dependencies... done
Will download: 2 packages (32.2 MB)
Downloading from 'copr:copr.fedorainfracloud.org:group_redhat-et:microshift'... done
Importing packages... done
Checking out packages... done
Running pre scripts... done
Running post scripts... done
Running posttrans scripts... done
Writing rpmdb... done
Writing OSTree commit... done
Staging deployment... done
Upgraded:
  ca-certificates 2021.2.50-3.fc35 -> 2021.2.52-1.0.fc35
  fwupd 1.7.2-1.fc35 -> 1.7.3-1.fc35
  fwupd-plugin-modem-manager 1.7.2-1.fc35 -> 1.7.3-1.fc35
  fwupd-plugin-uefi-capsule-data 1.7.2-1.fc35 -> 1.7.3-1.fc35
  gnupg2 2.3.3-2.fc35 -> 2.3.4-1.fc35
  iwl7260-firmware 1:25.30.13.0-126.fc35 -> 1:25.30.13.0-127.fc35
  iwlax2xx-firmware 20211027-126.fc35 -> 20211216-127.fc35
  kernel 5.15.6-200.fc35 -> 5.15.10-200.fc35
  kernel-core 5.15.6-200.fc35 -> 5.15.10-200.fc35
  kernel-modules 5.15.6-200.fc35 -> 5.15.10-200.fc35
  libxcrypt 4.4.26-4.fc35 -> 4.4.27-1.fc35
  linux-firmware 20211027-126.fc35 -> 20211216-127.fc35
  linux-firmware-whence 20211027-126.fc35 -> 20211216-127.fc35
  microshift 4.8.0-2021_11_19_125431.fc35 -> 4.8.0-2021_12_22_195815.fc35
  microshift-selinux 4.8.0-2021_11_19_125431.fc35 -> 4.8.0-2021_12_22_195815.fc35
  podman 3:3.4.2-1.fc35 -> 3:3.4.4-1.fc35
  podman-plugins 3:3.4.2-1.fc35 -> 3:3.4.4-1.fc35
  python3 3.10.0-1.fc35 -> 3.10.1-1.fc35
  python3-libs 3.10.0-1.fc35 -> 3.10.1-1.fc35
  selinux-policy 35.6-1.fc35 -> 35.7-1.fc35
  selinux-policy-targeted 35.6-1.fc35 -> 35.7-1.fc35
Run "systemctl reboot" to start a reboot
[root@microshift ~]# rpm-ostree status
State: idle
Deployments:
  fedora-iot:fedora/stable/aarch64/iot
                   Version: 35.20211225.0 (2021-12-25T13:26:07Z)
                BaseCommit: f0d89c61e020f64cec633b5eb162b81638e7af9cbdf8996586c4582690e09087
              GPGSignature: Valid signature by 8C5BA6990BDB26E19F2A1A801161AE6945719A39
             SecAdvisories: 1 moderate
                      Diff: 21 upgraded
           LayeredPackages: cri-o cri-tools microshift
            EnabledModules: cri-o:1.21

● fedora-iot:fedora/stable/aarch64/iot
                   Version: 35.20211212.1 (2021-12-12T21:08:43Z)
                BaseCommit: 6e5da88473ff059d6fb9bc11a39ad2610474178a16b0397ef56f697569f86efd
              GPGSignature: Valid signature by 8C5BA6990BDB26E19F2A1A801161AE6945719A39
           LayeredPackages: cri-o cri-tools microshift
            EnabledModules: cri-o:1.21

  fedora-iot:fedora/stable/aarch64/iot
                   Version: 35.20211212.1 (2021-12-12T21:08:43Z)
                BaseCommit: 6e5da88473ff059d6fb9bc11a39ad2610474178a16b0397ef56f697569f86efd
              GPGSignature: Valid signature by 8C5BA6990BDB26E19F2A1A801161AE6945719A39
            EnabledModules: cri-o:1.21
[root@microshift ~]# systemctl reboot
Code language: PHP (php)
Update, 2022-03-08
Summary
In the end, we have a tiny OpenShift called MicroShift running. I want to deploy more stuff for my Home Automation, for example, an MQTT Broker, but this is the next step.
Additional I want to share a couple of resources with you:
- MicroShift End to End Provisioning Demo – MicroShift on RHEL for Edge
- https://microshift.io/
- GitHub Repo: https://github.com/redhat-et/microshift
Enjoy your MicroShift if you have any questions join the community: https://microshift.io/docs/community/