This blog will cover my first experiments with an Intel Edison, a small Computer-on-Module, which Intel was so kind to give to me! Thanks again for this guys!
There are many websites explaining how to setup your development computer to work with an Intel Edison, like Intels own website. So I will assume you have followed those instructions and your Intel Edison is properly configured, connected to your WLAN, etc.
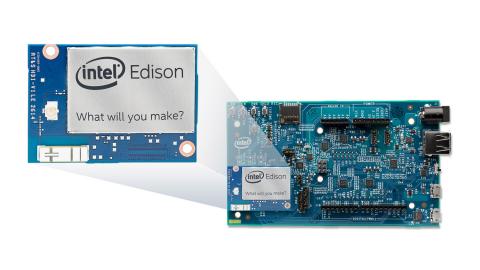
Intel was again so kind to not only provide me with an Intel Edison but also with a set of sensors/actors from Seeed, so this will be the base for our new sensor.
Node-RED
While in my previous sensors I developed everything via the Arduino-IDE, this time I wanted to give Node-RED a try. For those of you who have never heard of Node-RED, it is a visual tool for wiring together hardware devices, APIs and online services and it runs on the Intel Edison.
There is a nice development guide for Node-RED in progress. For the stuff I was doing, it did help me a lot.
Node-RED Setup on Intel Edison
To be able to run Node-RED on your Intel Edison, you will just have to run a few simple steps, all on your Intel Edison. These instructions are derived from an excellent video created by Brian Innes! Kudos for that!
Install Node-RED in your root users home directory
root@edison2:~# cd
root@edison2:~# npm install --unsafe-perm node-red
Link the Node-RED executables, so the commands can be executed from everywhere
root@edison2:~# cd /usr/bin/
root@edison2:~# ln -s /home/root/node_modules/.bin/node-red node-red
root@edison2:~# ln -s /home/root/node_modules/node-red/bin/node-red-pi node-red-pi
Install pm2 to enable an autostart of Node-RED
root@edison2:~# npm install -g --unsafe-perm pm2
root@edison2:~# pm2 start /usr/bin/node-red --node-args="--max-old-space-size=128"
root@edison2:~# mkdir /etc/init.d
root@edison2:~# pm2 save
root@edison2:~# pm2 startup
root@edison2:~# reboot
Install the prerequisites and Node-RED components for the Seeed-Grove Sensors
root@edison2:~# opkg update
root@edison2:~# opkg install mraa
root@edison2:~# opkg install upm
root@edison2:~# npm install node-red-contrib-smartnode
root@edison2:~# npm install node-red-contrib-smartnode-seeed
root@edison2:~# reboot
You can now access your Node-RED environment on your Intel Edison via http://<your Edison’s IP>:1880

Physical Setup
Before “coding” the application for our new brightness-sensor, let’s take a look at the physical setup. For the initial stage of this sensor board ( yes, I plan to add more sensors to the Edison ), I went with
- an Intel Edison with an Arduino Breakout
- a Base Shield

- a UV Sensor

With the UV-Sensor connected to the A0 ( first Analog Input) of the Breakout board, everything connected, my setup looks like this:

With the hardware ready to go, we can start with the implementation.
Node-RED – The “code”
As shown in the screenshot of the final “code”, our logic is only made up with a few very simple Node-RED components.
- The “Timer” node, which is actually not a timer at all. I just needed something to initiate the flow. As this is my first attempt with Node-RED, I had no better idea.

As you can see, the “timer” is only injecting a message during the start. The content of this message is the current time, but this doesn’t matter, as it will be ignored. - The “Brightness” node is the one who retrieves the measurement from the UV-Sensor. This sensor reading will then be used as the new message payload.

The properties of this node are, again, pretty self-explaining ( did I already mention that Node-RED is cool!? ) - My IoT Gateway expects the payload for sensor readings to be a csv message with the reading and a count. Our “Brightness” node only gives us the sensor reading, so we will have to extend the payload of the current message with a count. This is done by adding a custom function into the Node-RED flow.

In this place we also define the name of the MQTT Topic which we need to send our message an MQTT-Broker. - The “Deliver-2-Gateway” node is a MQTT publish node provided by Node-RED. Whatever data is in the current message.payload will be published to the defined broker, with the topic taken from message.topic property.

- Last, but not least, we can log the current message to the debug pane of our Node-RED web-UI


All that is left is to click the “deploy” button, which will deploy and start our flow

Integration with the IoT-Gateway
If you have my IoT-Gateway running, then you just need to use that Gatways IP-Address for the MQTT Broker. As we are sending the message in the right format, the logic of the Gateway can instantly pick up the message and apply the Complex Event Processing and transformation rules for these new sensor reading.
… did I already mention that Node-RED is cool?!
One reply on “Building an IoT Sensor with Node-RED on Intel Edison”
[…] For the installation of Node-Red, please take a look at my earlier blog. […]