It is 2020 and everybody is talking more and more about containers. A topic that came up around 2013 with Docker making an ecosystem for developers using containers for faster development cycles. But although the container hype is growing there are still lots of VMs out there, that may also have their right to exist. This post is about how to use both technologies in one platform without even having to think about the differences and it is about my first steps when trying this for the first time.
What is OpenShift Virtualization?
First of all let me start with a short introduction to OpenShift Virtualization. It is the Red Hat product behind the Open Source Project Kubevirt. Kubevirt is in essence a management Add-on for virtualization in Kubernetes and gives the developers the possibility to run Containers and VMs side by side. It adds virtualization resource types to Kubernetes and extends the API to manage those resources.
All this is being done by rolling out an operator for OpenShift Virtualization, that extends Kubernetes or OpenShift in our Case with new resource types plus agents and controllers to manage those resources. When we roll out a VM in the end, we create a container and run a KVM process in this container that is running the Virtual Machine. The Benefit is that the VM can be treated just like another container. And we all know that VMs need more than just Compute. They also need Networking and Storage. As this can be handled by Kubernetes’ pluggable architecture it is easy enough to treat the VM as a Container and schedule resources for it.
Enough theory, let’s play around with it :)!
Rolling out OpenShift Virtualization
First of all, I will not get into details regarding the requirements and all the things that come before rolling out the operator. You can find some good tutorials and information in the links provided in this blog post, to get you started with everything.
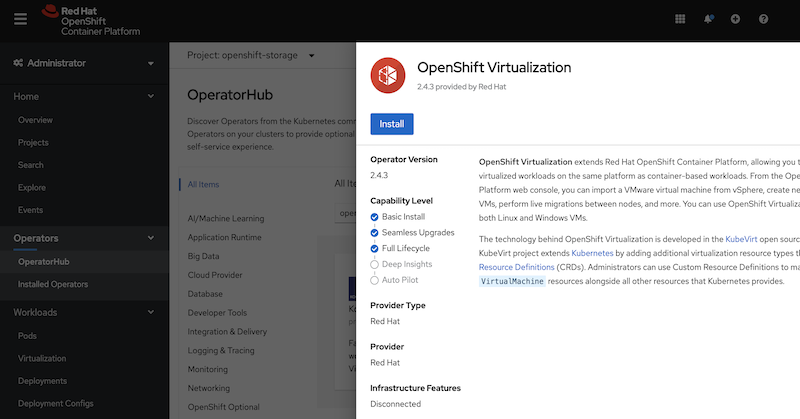
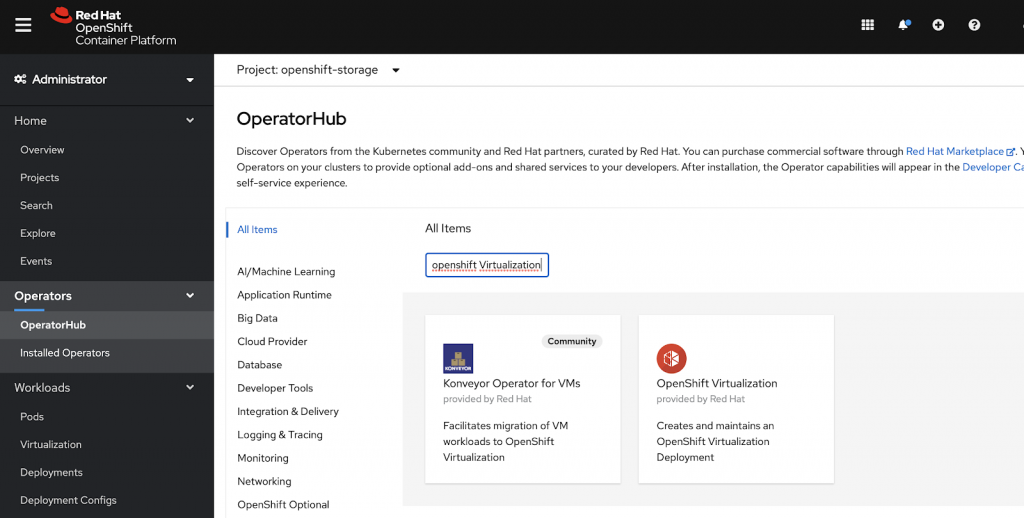
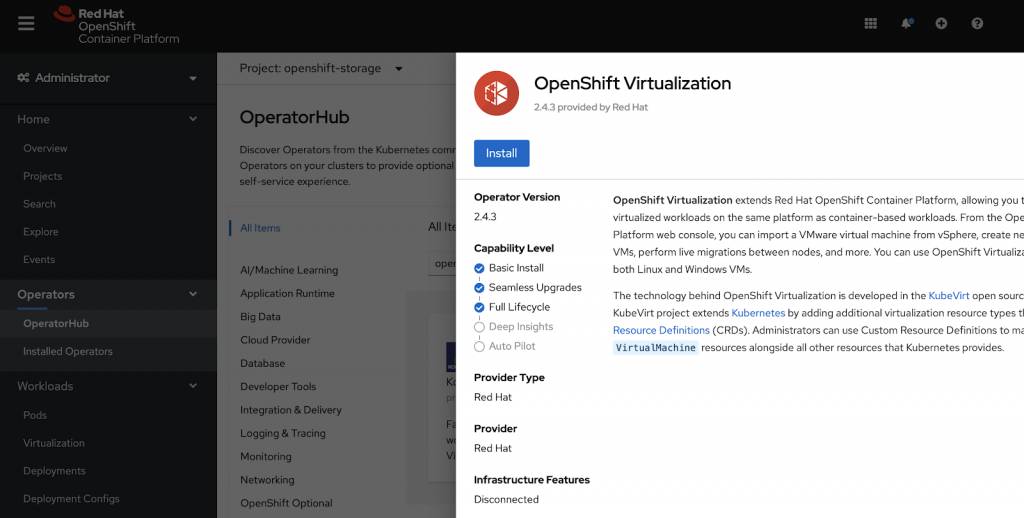
Let’s take a look at rolling out the OpenShift Virtualization Operator and creating the hyper converged virtualization Cluster. You can find the operator in your Operator Hub by searching for OpenShift Virtualization:
When you click on it you can choose to install the operator.
You select an approval Strategy for the Operator, a version to be installed as well as a namespace where it should be rolled out. If you keep it as is, it will create a Namespace for you called “openshift-cnv”.
When this was successfully created you can go into the operator and create a new virtualization cluster.
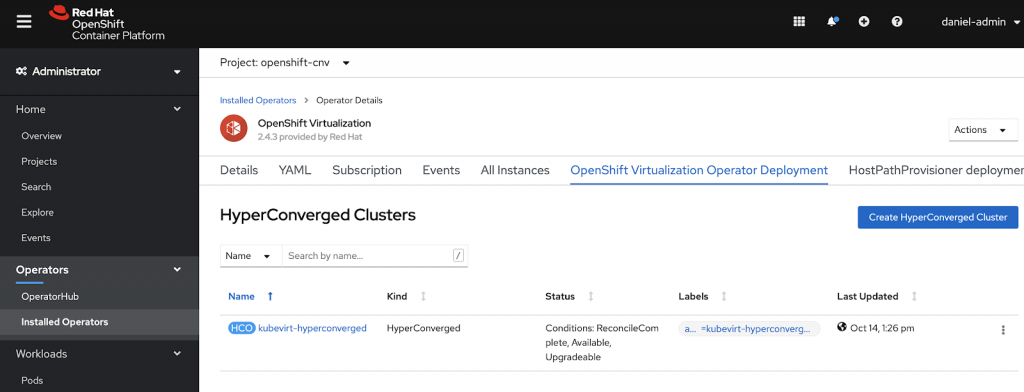
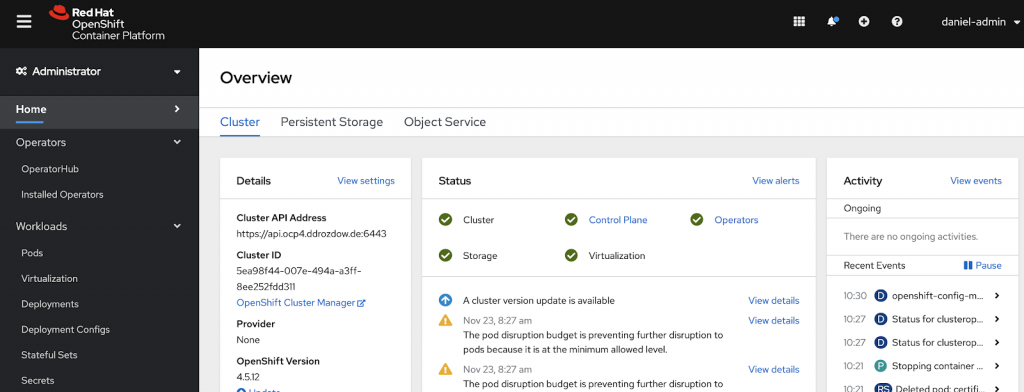
This creates everything you need to run your Virtual Machines side by side to your container workload. Plus it extends the UI with a new Workload under the Workload Section for Virtualization.
Now that we can run VMs in our OpenShift Cluster, how do we get actual VMs into OpenShift.
Many ways lead to our goal and I will walk you through a couple of those briefly in the next section.
How do I get my VM up there?
Let us shortly walk through the possibilities to get VMs into the Cluster. Everything can be done by CLI or UI. I’ll try to show both ways here. Let’s take a look at the UI first.
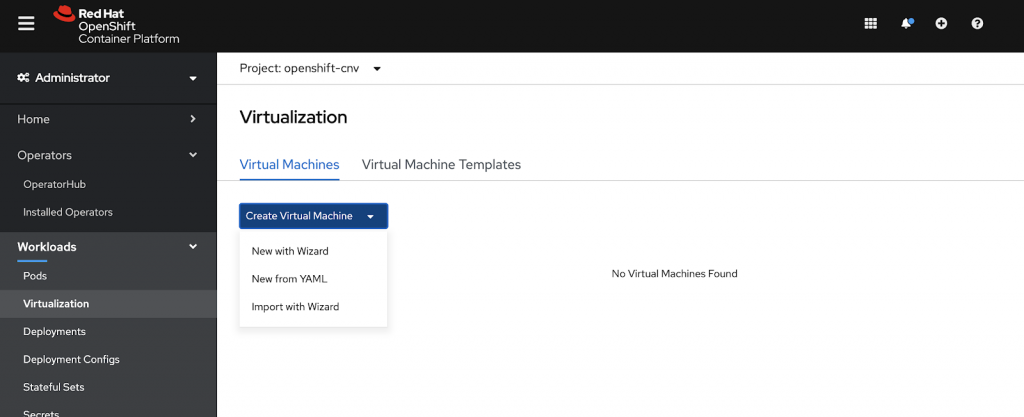
When diving into our new Workload “Virtualization” you see a new Dashboard with the possibility to create VMs and Templates. VMs can be created by an interactive Wizard just like in Virtualization Management Solutions we all know and love or by YAML Files, which some people love. Lastly you can also import already existing virtual machines.
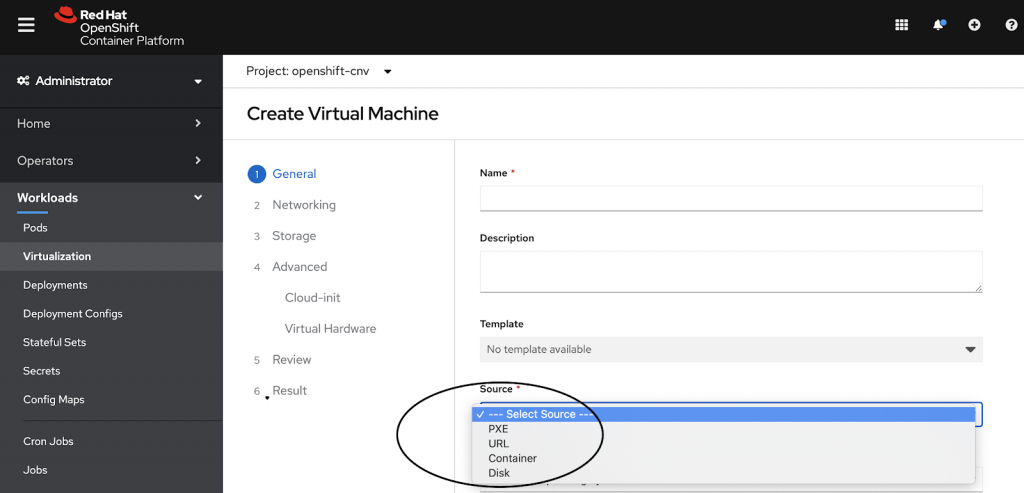
In the following screenshot you see the Wizard in the UI. There you can define the settings of your virtual machine. You can set up Name, Description and choose from a Template. I highlighted the Source you define for the creation of the VM. This can be done by pxe-Booting a VM, downloading an ISO from a URL, downloading a Cloud Image from a URL or by simply taking a Container Disk as a base for a VM, which is a very interesting option. But let me start by taking a Cloud Image from a public URL.
Using the wizard you also define the Storage to be used, special Hardware to be attached and finally a Cloud-init script, that allows you to change the properties and configuration of the cloud image you are using.
After going through the wizard the result will look like this and you are ready to fire up your first VM in OpenShift. Pretty neat if you ask me.

The VM Dashboard will look like this:
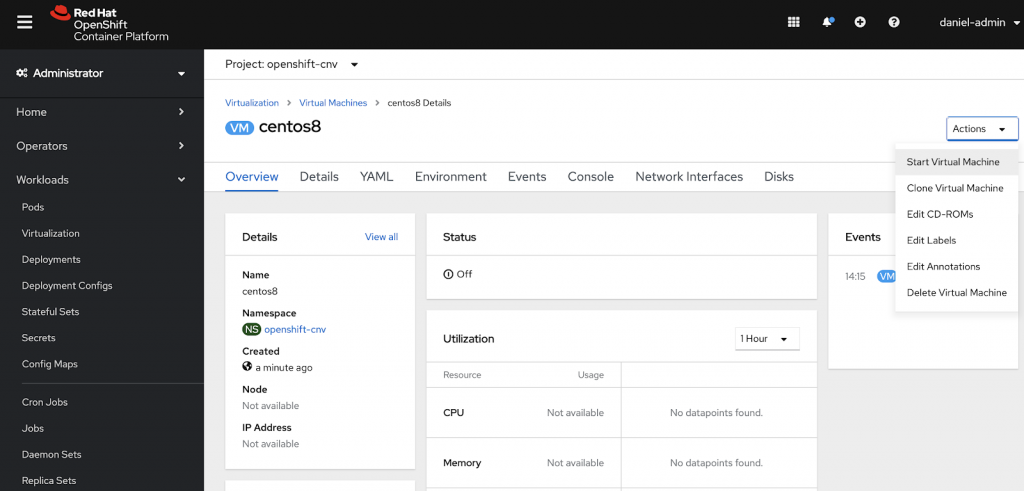
After hitting the start button it will start and create a persistent volume (PV) for the VM on the storage class you selected. Thereafter the qcow Cloud Image I chose will be downloaded from the selected URL. Finally a launcher pod is being created in which the VM will be running.
Lots of settings regarding the VM can be configured in the Virtual Machine Section of the UI and there is even a Console that you can use for accessing your VM. Another neat feature I think.
Ok, so now we have our VM running using the UI, but how would I do this with a YAML file? Let me just use a standard YAML example. It will create a Fedora VM from a container Disk that is stored in a container registry. “fedoravm.yaml”
apiVersion: kubevirt.io/v1alpha3
kind: VirtualMachine
metadata:
 labels:
   app: vm-example
   vm.kubevirt.io/template: fedora-server-tiny-v0.11.3
   vm.kubevirt.io/template.revision: '1'
   vm.kubevirt.io/template.version: v0.11.3
   os.template.kubevirt.io/fedora32: 'true'
   flavor.template.kubevirt.io/tiny: 'true'
   workload.template.kubevirt.io/server: 'true'
   vm.kubevirt.io/template.namespace: openshift
 name: vm-example
 namespace: openshift-cnv
 annotations:
   name.os.template.kubevirt.io/fedora32: Fedora 31 or higher
   description: VM example
spec:
 running: false
 template:
   metadata:
     labels:
       kubevirt.io/domain: vm-example
       kubevirt.io/size: tiny
       vm.kubevirt.io/name: vm-example
       os.template.kubevirt.io/fedora32: 'true'
       flavor.template.kubevirt.io/tiny: 'true'
       workload.template.kubevirt.io/server: 'true'
   spec:
     domain:
       cpu:
         cores: 1
         sockets: 1
         threads: 1
       devices:
         disks:
           - bootOrder: 1
             disk:
               bus: virtio
             name: containerdisk
           - disk:
               bus: virtio
             name: cloudinitdisk
         interfaces:
           - masquerade: {}
             model: virtio
             name: default
         networkInterfaceMultiqueue: true
         rng: {}
       machine:
         type: pc-q35-rhel8.2.0
       resources:
         requests:
           memory: 1Gi
     evictionStrategy: LiveMigrate
     hostname: vm-example
     networks:
       - name: default
         pod: {}
     terminationGracePeriodSeconds: 180
     volumes:
       - containerDisk:
           image: 'kubevirt/fedora-cloud-container-disk-demo:latest'
         name: containerdisk
       - cloudInitNoCloud:
           userData: |-
             #cloud-config
             password: fedora
             chpasswd: { expire: False }
         name: cloudinitdisk
You can just run:
~# oc create -f fedoravm.yaml
virtualmachine.kubevirt.io/vm-example created
Code language: PHP (php)
And your VM is being created. Just take a look:
~# oc get vm
NAME         AGE   VOLUME
centos8      43m
vm-example   22s
Code language: PHP (php)
There are two ways to start the just created instance. Either through the UI or by using the virtctl CLI Tool that allows you to control machine state. The virtctl CLI can be obtained either on Github for multiple Platforms or by simply installing the package through your Red Hat Subscription.
~# ~/Downloads/virtctl start vm-example
VM vm-example was scheduled to start
Code language: PHP (php)
If you want to see the running VM you will look at the output of the Virtual Machine Instances (VMI) running.
~# oc get vmi
NAME         AGE   PHASE     IP             NODENAME
centos8      48m   Running   10.129.1.0     master-0
vm-example   38s   Running   10.128.2.175   compute-1
Code language: CSS (css)
Accessing Virtual Machines
As we have our two VMs running now, it would be great to access them not only through the Console in the UI but maybe by connecting to them through SSH. This can be done by exposing the SSH port of a VM and then connecting to it from outside of the cluster. It must be said, that we will have to use Node-Ports for this, which means we will directly map a Port from our Worker Node to the SSH Port of the virtual machine we want to access.
The following command will just do that to our CentOS 8 Instance we created before:
~# ~/Downloads/virtctl expose vm centos8 --port=22222 --target-port=22 --name=centos-ssh --type=NodePort
Service centos-ssh successfully exposed for vm centos8
Code language: PHP (php)
In order to get the port that is being used on the Node we will check the service we just exposed:
~# oc get svc
NAME                                      TYPE        CLUSTER-IP       EXTERNAL-IP   PORT(S)             AGE
cdi-api                                   ClusterIP   172.30.51.196    <none>        443/TCP             41d
cdi-prometheus-metrics                    ClusterIP   172.30.66.233    <none>        443/TCP             41d
cdi-uploadproxy                           ClusterIP   172.30.203.95    <none>        443/TCP             41d
centos-ssh                                NodePort    172.30.140.126   <none>        22222:31660/TCP     23m
Code language: HTML, XML (xml)
As we already know our Centos Instance is running on the Node “master-0”. So we should be able to connect to our VM by doing the following:
ssh centos@192.168.50.10 -p 31660
Activate the web console with: systemctl enable --now cockpit.socket
Last login: Tue Nov 24 15:29:55 2020 from 10.129.0.1
[centos@centos8 ~]$
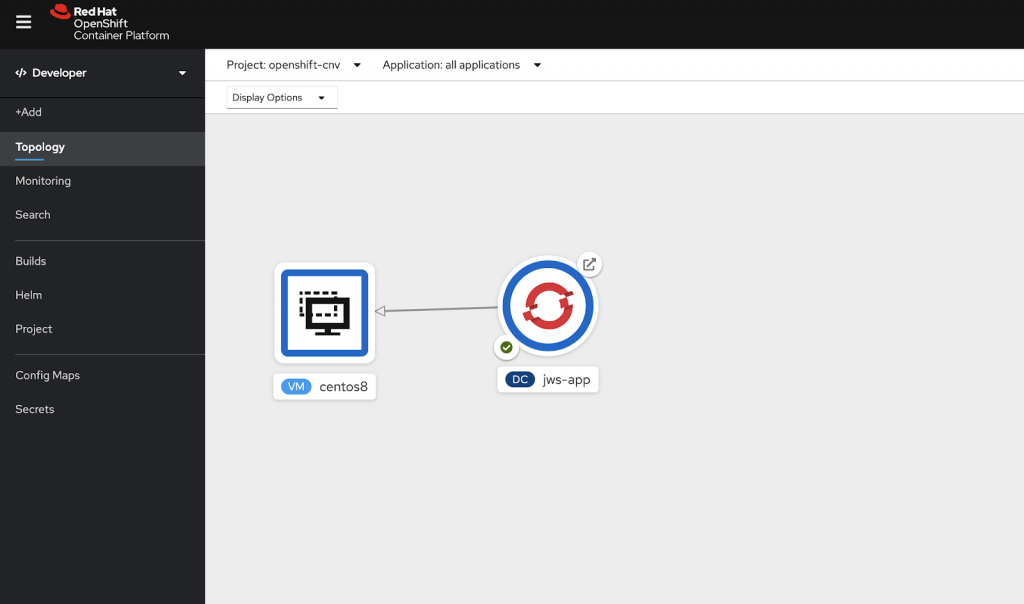
Code language: JavaScript (javascript)Now that we can export SSH as a Service it is also possible to expose other Services in the project the VM is running. The idea behind OpenShift Virtualization is to let VMs run as a native citizen next to container Workloads. Deployed in the same Project both use the same network and can access each other’s Services. They can be labeled as one application and viewed by the developers in the Topology View.
Conclusion
This post was about capturing my first steps with OpenShift Virtualization and how I started playing around with the technology. I have to admit that it was easier to start with than I thought. Maybe this was due to the fact that all I had to do is to roll out the Operator and then just start creating virtual machines. When it comes to bringing VMs onto the platform I hope the examples might be helpful. More detail can be found in the official documentation for OpenShift and of course from the Kubevirt Project. If you do not have an OpenShift Cluster to play around with, there are Labs for it or you can also just run minikube and activate the Kubevirt Add-on. This even worked on my Laptop.
From what I have seen so far, this is a great way to run containers next to VM Workloads that are sometimes necessary, as sometimes there are Services or Databases that cannot be containerized right away. So this is perfect to start the journey to modernize an existing application or just let it run until it will be replaced by a new application. It is also possible to bring Windows Server Workloads into your Cluster and expose those Services.
Just try it out yourself :)!